Hipnosis' Stuff
Hipnosis' Stuff

Recreating a server for a dead online single-player game - Jewelry Master

Introduction to online games

We’ve all played online games in our lives before, maybe even without really noticing it. Be it an MMO, a multiplayer mode, or just a game that requires server connection, since the late 90’s they are present everywhere and in different forms, and with the inclusion of the mobile market on top of the already massive PC userbase, it just picked up more and more momentum through the years.

Online games bridged the gap between video games and web technologies, finding a better use for them other than visiting silly websites and sending emails. Online games also gives you an experience that otherwise wouldn’t be possible, both for players and developers. But such great opportunities also come with an intrinsic cost: you need a connection to a server to be able to play. This is the major downside of online games, as its name implies, you must have an internet connection and at the same time, there has to be a server present on the other side. We can easily control the first one, but we have none of it for the second. This has become more of a problem in recent years, since this online server-client communication has also been deployed as a DRM solution against software piracy, but it also backfires as it makes the program in question completely reliant on this web server, rendering the software unusable without an internet connection (I already touched on the topic in my previous article, but I thought it was worth mentioning).

But as time goes on, we put all the laughs and fun aside and start looking at the bitter reality: nothing lasts forever. The game that you loved and played for years and years of your life is gonna go at some point, and all that will remain are the memories and the friends we made along the way. But hold on, not all hope is lost, all it takes is a guy with the time, knowledge and will to fix this problem.


Background

Something that I always wanted to do is to revive old online games, and since then I’ve wondered how easy or hard of a task it would be. When I started doing web development two years ago, I got to learn progressively how web technologies and network communications work, something confusing for me up to this point.

In my most recent project, Instagular (Instagram client reimplementation), I had to figure out how to reimplement and interface some of Instagram’s server-client communication functionality which required analyzing the requests between the two, including the user authentication management. This allowed me to cross-over web development and reverse engineering, and without even noticing it, gave me a taste of reversing and emulating a web server.

Fast-forward a couple of months and I decided to take a break from it to venture myself into another project similar in nature, but completely different at the same time. Something that I always wanted to do, but didn’t have the capacity nor the experience to do, until now: an online game web server emulator.


A diamond in the rough

Throughout the years, I’ve been keeping a list of online games that have already met their fate, and that would be potential candidates for when the right time comes. The one that was always on top of the list, and I knew it was going to be the first to go down, is Jewelry Master.

Jewelry Master was an online arcade puzzle game developed by Arika (of Tetris Grand Master and Street Fighter EX series fame) in 2006, and it was released as a testing project for a potential full console version in the future, which did happen four years later with the release of Jewelry Master Twinkle in Xbox 360. The servers for the game were closed around 2011, rendering the game completely unplayable.

I guess by this point you already get why I chose this title over anything else. Not only this game has some similarities with a game that I love, Tetris Grand Master 3 (to the point where I made an emulator and a resolution patch for it), but also because it is not an online multiplayer game, but rather an online single-player game, let me explain.

Jewelry Master has only two main online functions: user authentication and rankings/leaderboards management. But even then, the game won’t get past the login screen without a server running on the other side. This makes this title a perfect target for a first project like this, since I don’t have to deal with multiple servers, multiplayer state management and other fun online multiplayer concepts. And as you will read later, this game doesn’t have any sort of security/protection going on, so it’s gonna be straight to the point.

It’s also worth remembering that we are dealing with a game with no server available, so all we have to work with is the client program, which makes things unnecessarily more complicated than they should be. At the same time, I’ve never played this game before, so I’ve no idea how some things are supposed to work. For this project, we’ll be looking at the reverse engineering process, and later on applying all the knowledge we gathered to create a software solution able to replicate the original server functionality as close as possible.


Server communication

When opening the game we are prompted to the main menu, where we can log in with the user id and password we previously should’ve created on the now defunct account registration page. Regardless of the information we enter, the outcome is the same:


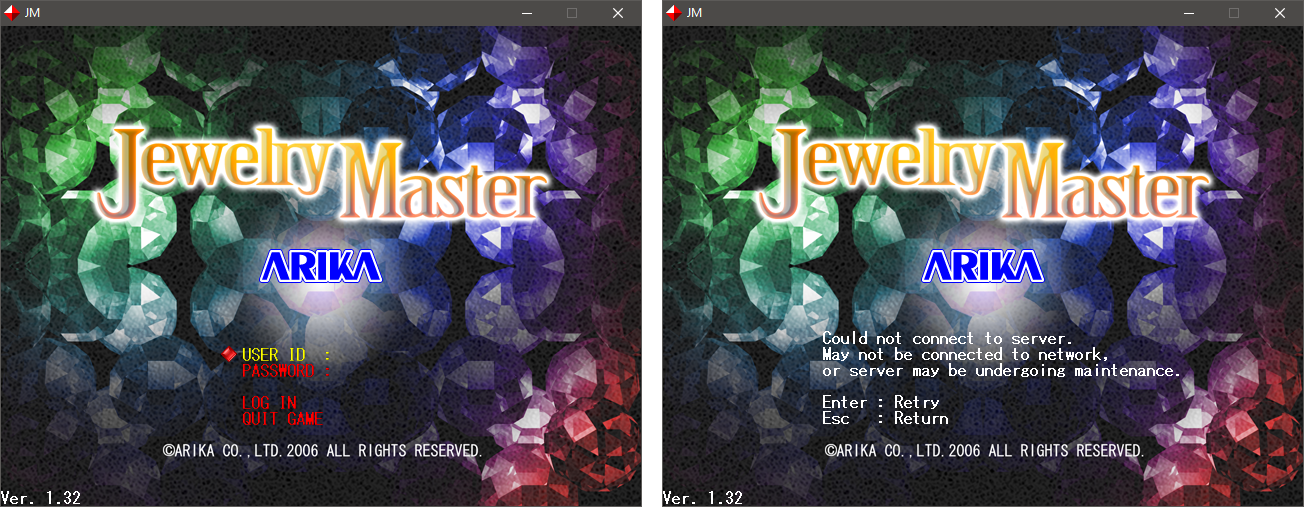
Clearly the game server is dead, so there’s nothing to connect to.


Now that we know the current situation, let’s take a look at the server communication in Wireshark:


Isolated the traffic generated by the game.


We can take some valuable information from here. We can see that the server domain is hg.arika.co.jp, and the DNS server can’t resolve an address for it. Because of this, we can’t go any further in the current state, so we need to find a way around it before continuing.


Tricking the game

So now we have to trick the game to search for the server in another place. Thankfully, on Windows we have the hosts file, which allows us to map a host name to a different IP address; a perfect temporary solution without having to patch the program or hook networking functions. By adding a new entry, we can redirect the domain name to any server we want, in our case the localhost:


Press to show the code
127.0.0.1 hg.arika.co.jp


With this little change, all the server calls under that domain will have the original server hostname replaced with localhost, while keeping the port number and the rest of the route intact. This now allows us to implement our own server as an in place replacement, as long as we keep the structure of the original, so let’s get to it.


Creating a server

For the development of the server reimplementation I’m going to use Node.js, since I work with it pretty much every day, but once everything is done, I’m also going to port the server code to C using some network library to make it more native and simple to run. Additionally, I’ll be using Express.js to make routing and other operations much easier to handle, so let’s start with a simple server:


Press to show the code
const express = require('express');
const app = express();
const port = 8081;

app.get('/', (req, res) => {
  res.statusCode = 200;
  res.send();
});

app.listen();

It just returns an ‘OK’ response.


This should allow us to get past the DNS error and finally be able to see what the game is actually requesting. So now let’s monitor the packets again in Wireshark (using the loopback traffic adapter now; otherwise we won’t be able to capture from localhost) and see what the game does:


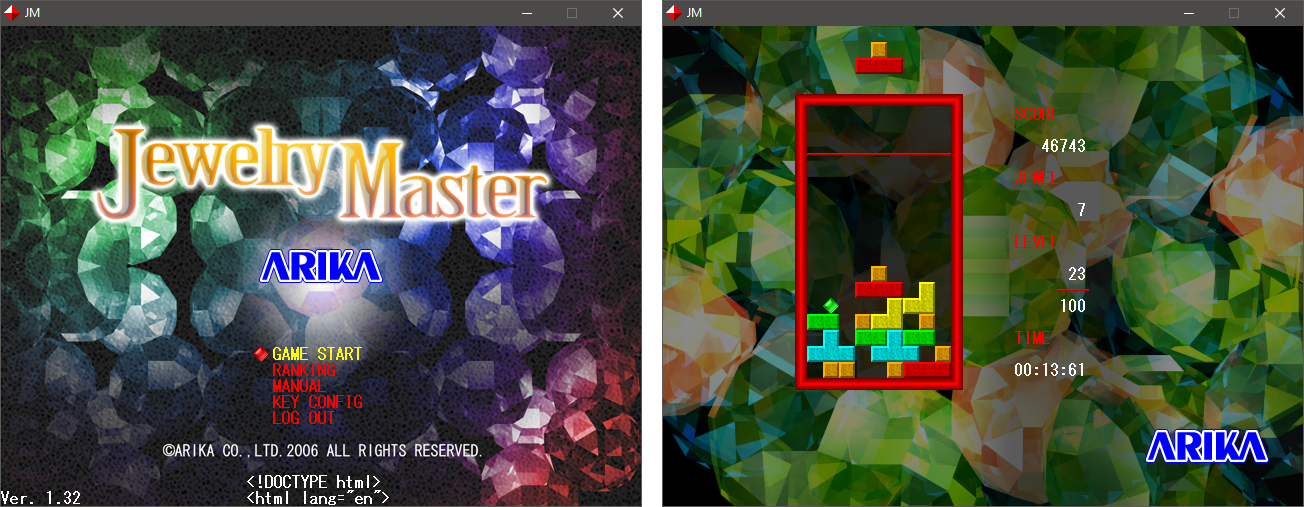
Well, that was easy.


I guess that’s it. It turns out the game doesn’t give a shit about the server after all, and it can work perfectly fine without any functionality implemented. In this state, everything works except for the text message (the broken HTML part), the reading and writing of high-score rankings and the replays system, but at its core the game is otherwise fully playable. So even if we can play the game in the current state, now it’s time to start implementing the server functionality piece by piece.


Reimplementing the server

If we take a look at the Wireshark dump we can see multiple requests to the server whose endpoints can’t be found, all of them under the /JM_test/service/ route:


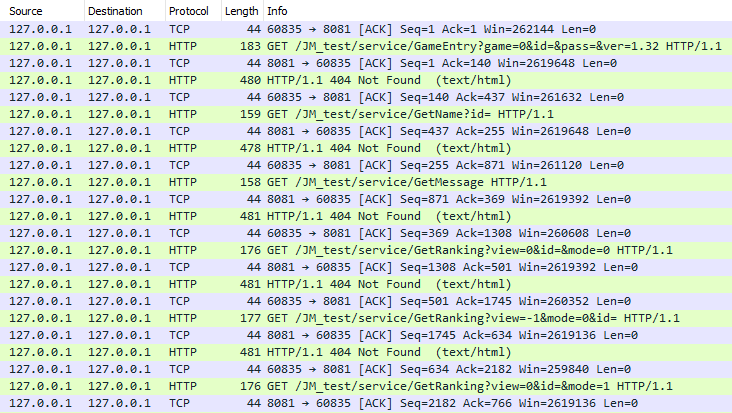
As we can see by the query string parameters, the game doesn’t encrypt any of its data, making our job far easier.


We can use this information (together with the strings in the executable) to know what route endpoints we need to implement in our custom server, and then look at how the client parses the expected data (or just start guessing) to finally figure out how everything works. It sounds good on paper, but let’s see what it actually takes.


Press to show the code
GET     /JM_test/service/GameEntry
GET     /JM_test/service/GetMessage
GET     /JM_test/service/GetName
GET     /JM_test/service/GetRanking
GET     /JM_test/service/GetReplay
POST    /JM_test/service/ScoreEntry

List of all the requests made by the program.


Let’s begin by getting out of the way the most straightforward of the bunch, GetMessage, by simply returning a string:


Press to show the code
app.get('/JM_test/service/GetMessage', (req, res) => {
  res.statusCode = 200;
  res.send('Hello World!');
});


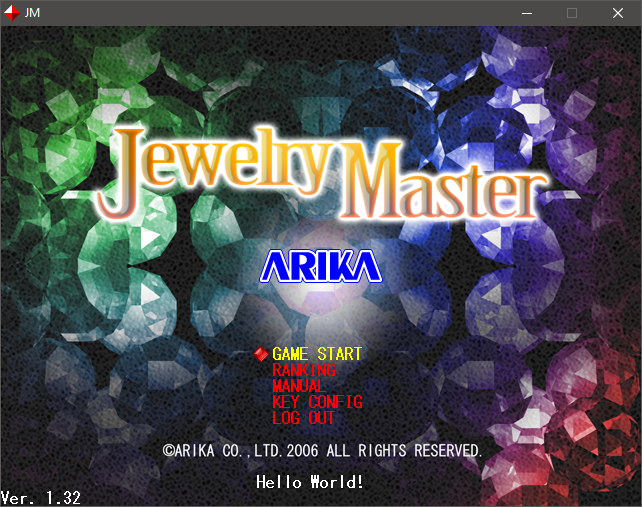
I feel utterly saddened for wasting this perfect opportunity to write a funny sentence instead of a simple Hello World!, but I’m a grown adult and must behave as such.


The one that gets called the most is GameEntry, which I assume is for user authentication, used for logging in, getting rankings and starting a game. Nowadays you would expect an encrypted token to be securely transferred to the server, but here we just have an id and pass query parameters. There’s also a game param, which always has the value of 0, and a ver param, for making sure that the client is always up to date.

This is the point at which we have to start thinking about building a database for storing this user data (and later on, score rankings as well). For this I’m going to use MongoDB with Mongoose for object modeling (because I would prefer to die before using SQL), although any other database engine would do just fine. So assuming a user model with the fields id, pass and rankings (for personal scores), a complete implementation will look like this:


Press to show the code
app.get('/JM_test/service/GameEntry', (req, res) => {
  res.statusCode = 200;
  User.findOne({ id: req.query.id, pass: req.query.pass }, (e, user) => {
    // Check if user exists and the credentials are correct.
    if (user) { res.send(); }
    // Check for users with the same id and create a new one if allowed.
    else if (req.query.id.length > 0 && options.register) {
      User.findOne({ id: req.query.id }, (e, exists) => {
        if (!exists) {
          // Store new user into the database.
          const user = new User({ id: req.query.id, pass: req.query.pass, rankings: [] });
          user.save(); res.send();
        // An user with this id already exists.
        } else { res.send('1'); }
      });
    // Wrong user id or password.
    } else { res.send('1'); }
  });
});


This code doesn’t perform any security measures, since that is outside the scope of this project. In a real online service (if someone wants to do that), this behaviour should probably be changed, or at least not store the passwords as plain text. Besides that, I added a register property in an options object, which allows users to be registered from the game client itself if the id doesn’t match any results in the database (this may also be changed for a real online server). Also, you may notice the return of 1 as an error message if the login fails. After some research, I found that this is the response to trigger the ‘wrong id or password’ message in the game client, in addition to the code 10 for server connection error and one more code that I couldn’t find which will trigger the version mismatch error.

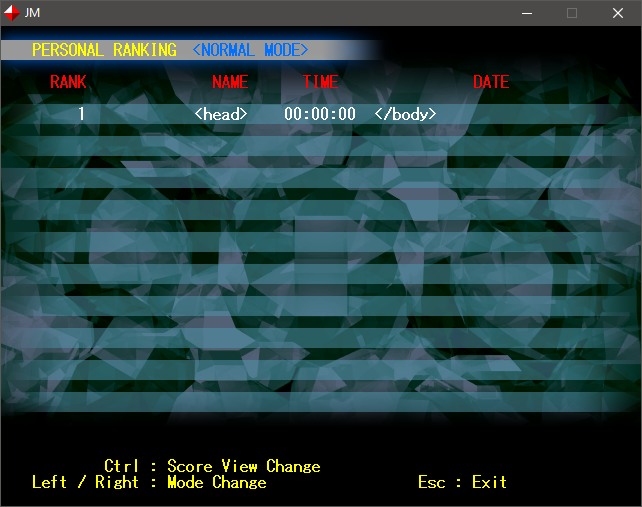
Next we have the GetRanking call, which is perhaps the last bit of reversing that we’ll have to do for the rest of the project, since none of the remaining endpoints require data specially formatted as a response. The query parameters here are id (user id, which can be optional), mode (difficulty), which can be 0 (normal), 1 (hard) or 2 (death), and a view param, to determine between user or global rankings. Before continuing, let’s see how rankings are structured and classified, and what the game response is so far.

The rankings are classified into two major groups: personal rankings and global rankings, and each is sub-classified depending on the difficulty, giving a total of 6 ranking lists. The main difference between the two is that the personal rankings can store up to 10 score entries for each mode without replays saving, whereas the global rankings can hold an undefined amount of scores with replay storage but only one per user. Rankings, both personal and global, consist of the following fields: id (user id, owner of the entry), mode, score, jewel, level, class (I assume it’s for the player title) and time (there’s also a date field in-game, but apparently never got implemented). These fields are also sent by the client for the ScoreEntry call, so we can create a schema model from them.


It seems like the game is trying to parse the ‘not found’ HTML page that Express.js sends back automatically.


This took me a couple of hours to figure out, but here’s a breakdown of how the rankings formatting and parsing work: each ranking object is a 10 lines long string, and in a group they’re delimited by a dot (.) character. The first two lines correspond to the rankings table index and ranking id, and next are (in order) the id (user), score, an unused value, level, class, time, jewel and finally a highlight flag. The first two values are only useful for the global rankings, since the first one is used to set the initial position of the user highscore when loading the global rankings (and to get the My Record index), and the second is an identifier value (given by the server) to retrieve the replay file with GetReplay. The class value (again, assuming is the score title) can be 101, 102, 201, 202, 301, 302 and 303, and the highlight flag makes the score’s color yellow, although I don’t know under what conditions a score should be flagged with it (once again, I’ll assume its intended use is to mark the user’s highest score in a table).

The funny part is that each ranking object has to be exactly 10 lines long, one more or one less and the client will crash. It just so happens that the Express.js default response is also 10 lines long, therefore working perfectly fine as a valid ranking object. This was the key to understand why the program was crashing on me whenever I changed the response, and eventually helped me to figure out the format. The complete implementation:


Press to show the code
app.get('/JM_test/service/GetRanking', (req, res) => {
  res.statusCode = 200;
  // Manage personal rankings.
  if (req.query.id && req.query.view == '0') {
    User.findOne({ id: req.query.id }, (e, u) => {
      let ranks = [];
      // Sort rankings in descending order.
      let rankings = u.rankings.sort((a, b) => b.score - a.score);
      for (let r of rankings) {
        // Build response string.
        let lit = (r == 0) ? 1 : 0;
        let rank = `0\n0\n${r.id}\n${r.score}\n0\n${r.level}\n0\n${r.time}\n${r.jewel}\n${lit}`;
        // Add rankings for the selected mode.
        if (req.query.mode == r.mode) { ranks.push(rank); }
      }
      // Return concatenated strings.
      res.send(ranks.join('.'));
    });
  // Manage global rankings.
  } else {
    // Sort rankings in descending order.
    Ranking.find({ mode: req.query.mode }).sort({ score: -1 }).exec((e, r) => {
      if (r.length > 0) {
        let ranks = [], f = -1;
        // Set rankings table index.
        let index = req.query.view == '-1' ? 0 : req.query.view;
        if (req.query.id) {
          // Get user score position table index.
          f = r.findIndex((v) => v.id == req.query.id);
          if (f != -1) { index = Math.floor(f / 10); }
        }
        // Fill the 10-slots scores table.
        for (let i = (index * 10); i < (index * 10 + 10); i++) {
          if (!r[i]) { break; }
          // Build response string.
          let lit = (i == f) ? 1 : 0;
          ranks.push(`${index}\n${r[i]._id}\n${r[i].id}\n${r[i].score}\n0\n${r[i].level}\n${r[i].class}\n${r[i].time}\n${r[i].jewel}\n${lit}`);
        } res.send(ranks.join('.'));
      } else { res.send(); }
    });
  }
});


But to be able to see the rankings, we need to be able to store them in first place. So now it’s time to add an endpoint for the ScoreEntry call, which unlike the rest, is the only POST request of the bunch. Despite this though, all the score data is still transferred through query parameters, since the actual body is used to send the replay data. I’m not gonna get into the code of this one since it’s pretty lengthy and just stores the received data, but it’s worth mentioning that the server handles the rankings and replays accordingly, updating and replacing entries whenever necessary. I also implemented a multiscores option, to allow multiple scores per-user on the global rankings, allowing multiple replays to be stored as well. The data is sent as an application/octet-stream object wrapped around a multipart/form-data request. While Express.js has a built-in function to send data as an attachment (download), it cannot receive/store (upload) these types of requests, for which I’ll use the middleware Multer to get that job done.


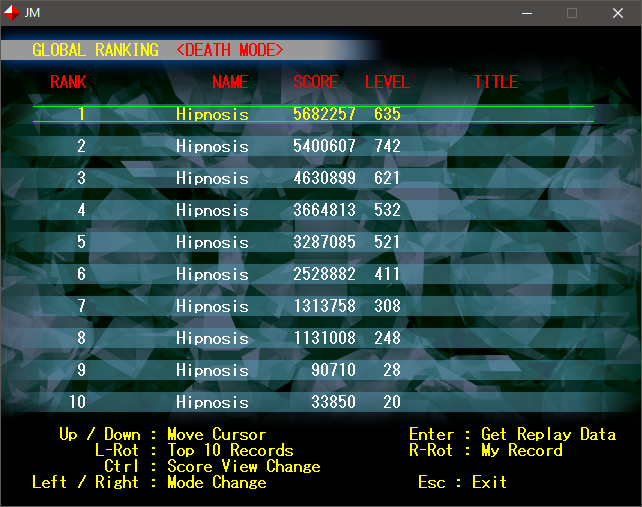
Pretty good scores for just a test session, if I say so myself.


And now that we have the replays stored on the server, we can retrieve them on the client’s demand. Implementing GetReplay is as simple as it gets (remember that we control the replay id value, sent with GetRanking):


Press to show the code
app.get('/JM_test/service/GetReplay', (req, res) => {
  res.download(path.resolve() + '/rep/' + req.query.id + '.rep');
});

The replays are stored under the rep folder with the .rep extension.


Finally, last and absolutely least the GetName call, which I couldn’t find a use for. It’s just sittin’ there.


Porting the server

With the Node.js server up and running with all features implemented, now it’s time to go to the dark side, a place that I don’t wish even my worst enemy to be, making a web server in The C Programming Language™. For this masochist task, I’ll be helping myself with Mongoose Web Server (not to be confused with the previous Mongoose for database modeling), a C library designed for creating small servers on embedded devices, and LMDB a very light-weight and performant key-value database engine (in contrast to the document-based Mongo). Other libraries that I’ll be using include mjson (by the developers of Mongoose) to parse the database objects and the JSON requests from the client, and ini (great name my dude) for parsing the configuration file for the server. I’m not going to explain in detail the C implementation (unless you want to hear me rant about stupid memory allocation errors and how shit is to work with objects and strings, sorry, structs and null-terminated char arrays in C) as it’s basically the same conceptually as we’ve already seen with Node.js, and the code is like 4 times bigger, so there’s that. You can go and check it out on GitHub if you want.

I will however, talk about the new addition to this version, namely the DLL injection and hook of networking functions. So far we’ve been editing the Windows hosts file to redirect all the client calls to our local server, but wouldn’t it be neat not to have to? Besides, it would be great to have the server starting and running in the background while the game executes and to stop it automatically when the game closes, so it’s basically going to be the whole package, as transparent as possible. At the same time we want some flexibility, so we can still use this hook to connect to other servers, both C and Node.js ones, either locally or over the internet, so let’s get to it.


Injecting the hooks

Out of the gazillion ways there are to inject DLLs and hook system functions, I’ll be using an injection method that I had from a previous project, and the well-known MinHook as the hooking library. So let’s find out what we need to hook by opening Ghidra and looking at the imports on the game executable:


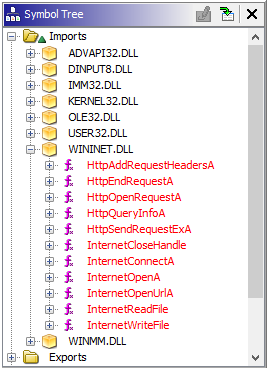
Out of all the libraries, the one that we’re looking for is WinINet (wininet.dll), which is a system networking API that handles all the communication operations through HTTP or FTP. Since all we want to do here is to redirect the server calls, the only functions we need to hook are InternetOpenUrlA for all the GET requests, and InternetConnectA which is necessary for ScoreEntry to open the connection before requesting the URL. To implement the hooks, we initialize MinHook in DllMain and point to the detouring functions, which will modify the hostname to point to the address we give to it, and finally returning the execution flow to the original function call with the modified parameter.


Press to show the code
// Define pointers to the original functions.
typedef int (WINAPI *INTERNETCONNECTA)(HINTERNET, LPCSTR, INTERNET_PORT, LPCSTR, LPCSTR, DWORD, DWORD, DWORD_PTR);
INTERNETCONNECTA fpInternetConnectA = NULL;
typedef int (WINAPI *INTERNETOPENURLA)(HINTERNET, LPCSTR, LPCSTR, DWORD, DWORD, DWORD_PTR);
INTERNETOPENURLA fpInternetOpenUrlA = NULL;

// Define functions to overwrite the originals.
int WINAPI dInternetConnectA(HINTERNET hInternet, LPCSTR lpszServerName, INTERNET_PORT nServerPort, LPCSTR lpszUserName, LPCSTR lpszPassword, DWORD dwService, DWORD dwFlags, DWORD_PTR dwContext) {
  // Change the original host with the configured IP address.
  return fpInternetConnectA(hInternet, (LPCSTR)HOSTNAME, nServerPort, lpszUserName, lpszPassword, dwService, dwFlags, dwContext);
}
int WINAPI dInternetOpenUrlA(HINTERNET hInternet, LPCSTR lpszUrl, LPCSTR lpszHeaders, DWORD dwHeadersLength, DWORD dwFlags, DWORD_PTR dwContext) {
  // Change the original host with the configured IP address.
  char buf[200]; int ofs = 21; snprintf(buf, 200, "http://%s%s", HOSTNAME, lpszUrl + ofs);
  return fpInternetOpenUrlA(hInternet, buf, lpszHeaders, dwHeadersLength, dwFlags, dwContext);
}

BOOL WINAPI DllMain(HMODULE hModule, DWORD fdwReason, LPVOID lpReserved) {
  switch (fdwReason) {
    case DLL_PROCESS_ATTACH:
      // Initialize MinHook.
      MH_Initialize();
      // Hook InternetConnect() and InternetOpenUrl() to redirect server calls to localhost.
      MH_CreateHookApiEx(L"wininet", "InternetConnectA", &dInternetConnectA, (LPVOID *)&fpInternetConnectA, NULL);
      MH_CreateHookApiEx(L"wininet", "InternetOpenUrlA", &dInternetOpenUrlA, (LPVOID *)&fpInternetOpenUrlA, NULL);
      MH_EnableHook(&InternetConnectA);
      MH_EnableHook(&InternetOpenUrlA); break;
    case DLL_THREAD_ATTACH: break;
    case DLL_THREAD_DETACH: break;
    case DLL_PROCESS_DETACH:
      // Disable hooks and close MinHook.
      MH_DisableHook(&InternetConnectA);
      MH_DisableHook(&InternetOpenUrlA);
      MH_Uninitialize(); break;
  } return TRUE;
}

Notice the HOSTNAME global variable, which will store the server address that’s in the server.ini configuration file. Not showing the options parsing for brevity.


To close this segment, I’d like to mention that I also wanted to hook the Direct3D 9 library and add an option to force the window mode to fullscreen, but I encountered several problems. It turns out that, as you could see from the imports, there’s no d3d9.dll to be seen. That’s because the program delegates all the game functionality (video, audio, inputs, data unpacking, etc.) to the library Skeleton.dll, which gets loaded with LoadLibraryA after the initial program execution. Due to the way MinHook works (and any other hooking library), it needs the DLL to be already loaded in memory to get its address and make the hook. That wouldn’t be an issue if we just created a hook for LoadLibraryA and after the call we create a new hook inside of it with the DLL already loaded, right? While it should work that way (I mean, I guess), MinHook returns an initialization error when trying to enable the hook, despite being able to create it perfectly fine. I assume it’s a MinHook specific error, but at this point I’m too lazy (and short of time) to report the problem or make a change of library, and none of the alternatives I found were as simple to use and minimal in size. I guess it will be for another time.


Server configuration and program usage

Now that both the server and library hooking are done, let’s quickly talk about how they’ll work from the user perspective. As I mentioned previously, I wanted flexibility in how to use the program, being able to play locally, connect to an online server, or host your own. To achieve this, I designed server modes which, depending on the one selected, will change the way the program behaves:


  • Mode 0 is for local single-player, running the server in the background while executing the game client.
  • Mode 1 is for online play, disabling the server and database initialization and connecting to the address specified in the configuration file.
  • Modes 2 and 3 are to host a server under the address specified in the configuration file. One opens the game client, the other a console with server information.


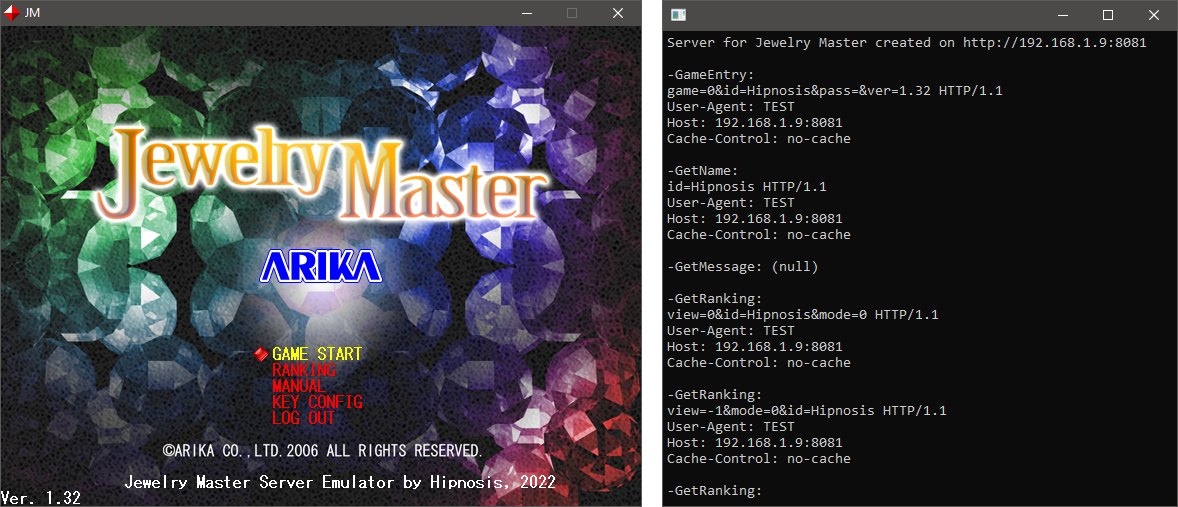
A server running in online mode (1) connected to a server in host mode (2) in a LAN connection.


I also added an option to disable the DLL hooking, since it may trigger anti-viruses (this will require adding the hosts file entry manually). Besides the connection configuration, there are also the previously mentioned user options: register, multiscores and a no scores option, because why not. Apart from this, just put the files in the game folder and you’re good to go. Speaking of which, since the game client can’t be downloaded officially anymore, I took the liberty to upload it to archive.org. This client is version 1.32, the only one saved by the Wayback Machine, but the last known version is 1.40. If I ever get a hold on that one I’ll update the archive, and if not much changed, the server should work for it as well, considering that we don’t have any hard-coded patches.


Server error: disconnecting…

This one, as per usual, has been an interesting experience overall. I finally got to work on a server emulator and discover if all the ideas and speculations I had throughout the years were true. I acknowledge that this particular case was a very simple example, and not very representative for server emulators in general (usually far more complex), but even then it was enough to answer my questions and in the end being able to fulfill my goal of bringing a dead game back to life. And besides, the feeling of knowing that you are (probably) the first person to play a game in over a decade is just priceless, although in this case in particular I already know that I’m not (another guy already attempted this some years ago, but he never figured out the rankings system format).

I’m also very surprised by the amount of things that just worked by pure guesswork and trying things, like the initial server creation and the rankings format, more than ever before. I first thought that it would take more than a week just to reverse the client and understand how it worked to some extent, but in reality it only took around 3-4 days including the full development of the Node.js server. In fact, I spent most of my time fighting with the C implementation, for almost 2 weeks. I guess it’s understandable considering that before this project I never really made a program in C from scratch (not even a Hello World!), purely by myself. It was one day to figure out how to build a server, another to understand memory allocation, pointers, compiling, you get the point (pun absolutely intended).

In the end I’m very happy with the results, and I hope this serves as a foundation for future projects of the like, since this is definitely just the beginning.

Recreando un servidor para un videojuego en línea ya muerto - Jewelry Master

Introducción a los videojuegos en línea

Todos hemos experimentado juegos en línea alguna vez, incluso sin siquiera notarlo. Ya sea un MMO, un modo multijugador, o simplemente el requerimiento de una conexión a un servidor, desde finales de los 90 los juego en línea se encuentran por todos lados y en formas diferentes, y con la inclusión de las plataformas móviles sobre la ya masiva base de usuarios de PC existente, solo continuaron creciendo cada vez más a través de los años.

Los juegos en línea unificaron a los videojuegos con las tecnologías web, encontrando así un mejor uso para éstas más que visitar sitios web y enviar correo. Éstos también ofrecen una experiencia que de otra manera no sería posible, tanto para usuarios como desarrolladores. Pero semejantes oportunidades también vienen con un precio: es necesaria una conexión a un servidor para poder jugar. Ésta es la mayor desventaja de los juegos en línea, ya que como su nombre indica, es necesario tener una conexión a internet, y al mismo tiempo, tiene que existir un servidor del otro lado. Podemos manejar la primera parte fácilmente, pero no tenemos ningún control sobre la segunda. Esto se volvió un problema en los últimos años, ya que esta comunicación entre servidor-cliente se ha implementado también como una forma de protección (DRM) ante la piratería de software, pero en contraparte hace que el programa sea completamente dependiente en este servidor web, haciendo de éste totalmente inútil sin una conexión a internet (ya hablé sobre el tema en el artículo anterior, pero pensé que valía la pena mencionarlo).

Pero conforme pasa el tiempo, dejamos de lado todas las risas y los buenos momentos y empezamos a ver la cruda realidad: nada dura para siempre. Ese título que tanto amas y que jugaste durante años va a desaparecer en algún momento, y todo lo que va a quedar son los recuerdos y los amigos que hicimos en el camino. Pero pará, no todo está perdido, solo es cuestión de que aparezca alguien con el tiempo, conocimiento y ganas para solucionar este problema.


Antecedentes

Algo que siempre quise hacer es revivir viejos juegos en línea, y desde entonces me pregunté que tan complicado sería hacerlo. Cuando empecé a hacer desarrollo web hace dos años, pude comprender de forma progresiva como funcionan las tecnologías web y la comunicación entre redes, cosas que siempre me fueron confusas hasta ese punto.

En mi proyecto más reciente, Instagular (reimplementación del cliente de Instagram), tuve que averiguar como reimplementar y comunicar cierta funcionalidad servidor-cliente de Instagram, para lo que fue necesario analizar las peticiones entre ambos, incluyendo la autenticación de usuario. Esto me permitió combinar desarrollo web con ingeniería inversa, y sin darme cuenta, me dió un panorama sobre retroingeniar y emular un servidor web.

Pasaron unos cuantos meses y decidí tomarme un descanso de ese proyecto para enfocarme en otro de naturaleza similar, pero completamente diferente al mismo tiempo. Algo que siempre quise hacer, pero no tenía la capacidad ni experiencia para hacerlo, hasta ahora: un emulador de servidor web para un juego en línea.


Un diamante en bruto

A través de los años mantuve una lista de juegos en línea que ya pasaron a mejor vida, y que serían candidatos para cuando llegase el tiempo indicado. Uno que siempre estuvo al principio de la lista, y sabía que sería el primero en caer, es Jewelry Master.

Jewelry Master fue un juego de rompecabezas arcade en línea desarrollado por Arika (conocidos por las series Tetris Grand Master y Street Fighter EX) en 2006, y fue lanzado como un proyecto de pruebas para evaluar la posibilidad de una versión más producida para consolas en el futuro, lo cual sucedió cuatro años más tarde con el lanzamiento de Jewelry Master Twinkle en Xbox 360. Los servidores se dieron de baja alrededor del año 2011, resultando en que este título ya no se pueda jugar.

Supongo que a estas alturas ya sabés por qué elegí este título en particular. No solo éste tiene similitudes con un juego que me encanta, Tetris Grand Master 3 (hasta el punto en que desarrollé un emulador y un parche de resolución para éste), pero también porque este no es un juego en línea multijugador, sino uno en línea para un solo jugador, dejame explicar.

Jewelry Master solo tiene dos funcionalidades en línea: autenticación de usuario y manejo de puntuaciones/tabla de posiciones. Pero aún así, el juego no pasa de la pantalla de inicio sin un servidor funcionando del otro lado. Esto hace que este título sea el sujeto perfecto para un primer proyecto como este, ya que no tenemos que preocuparnos por múltiples servidores, control de estado multiugador y otros conceptos similares. Y como podrás leer más adelante, este título no tiene ningún tipo de seguridad o protección, así que va a ser directo al grano.

También es importante recordar que estamos tratando con un juego sin servidor disponible, así que todo lo que tenemos para trabajar es el cliente, lo cual hace las cosas mucho más complicadas de lo que deberían ser. En adición, nunca probé este juego personalmente, así que no tengo idea de como deberían funcionar ciertas cosas. Para este proyecto, vamos a ver el proceso de ingeniería inversa, para después poder aplicar todo el conocimiento adquirido en una solución de software que sea capaz de replicar la funcionalidad del servidor original lo más cerca posible.


Comunicación con el servidor

Cuando abrimos el programa somos llevados al menú principal, donde podemos iniciar sesión con el nombre de usuario y contraseña que deberíamos haber creado anteriormente en la ya difunta página web de registro. Independientemente de la información que introduzcamos, el resultado es siempre el mismo:


Claramente el servidor está muerto, así que no hay nada a lo que conectarse.


Ahora que ya conocemos la situación actual, veamos la comunicación con el servidor en Wireshark:


Isolado el tráfico generado por el juego.


Podemos sacar información valiosa de esto, y ver que el dominio del servidor es hg.arika.co.jp, para el cual el servidor DNS no puede encontrar una dirección válida. Debido a esto, no podemos avanzar mucho más en la situación actual, así que tenemos que encontrar una manera de poder continuar.


Engañando al cliente

Ahora tenemos que engañar al juego para que busque al servidor en otra parte. Para nuestra suerte, en Windows tenemos el archivo de hosts, que nos permite redirigir un nombre de host a una dirección IP diferente, una solución temporal perfecta que nos permite evitar tener que parchear el programa o hacer hooking (inyección de código) en las funciones de red. Añadiendo una nueva entrada, podemos redirigir el nombre de dominio a cualquier servidor que queramos, en nuestro caso el localhost:


Presiona para mostrar el código
127.0.0.1 hg.arika.co.jp


Con este pequeño cambio, todas las llamadas al servidor bajo ese dominio van a tener el nombre de host reemplazado con localhost, mientras el número de puerto y el resto de la URL quedarán intactos. Esto nos va a permitir implementar nuestro propio servidor como un reemplazo in-situ, siempre y cuando mantengamos la estructura del original, así que vamos a eso.


Creando un servidor

Para el desarrollo de la reimplementación del servidor voy a usar Node.js, ya que lo uso prácticamente todos los días, pero una vez que esté todo terminado, también voy a portear el código del servidor a C usando alguna librería de redes para que sea más nativo y simple de usar. Además, voy a estar usando Express.js para que el enrutamiento y demás operaciones sean más fáciles de manejar, así que empecemos con un servidor sencillo:


Presiona para mostrar el código
const express = require('express');
const app = express();
const port = 8081;

app.get('/', (req, res) => {
  res.statusCode = 200;
  res.send();
});

app.listen();

Esto solo devuelve un ‘OK’ como respuesta.


Esto nos debería permitir pasarnos el error de DNS y finalmente poder ver que es lo que el programa le está pidiendo al servidor. Vamos a volver a monitorear los paquetes con Wireshark (usando ahora el adaptador de tráfico loopback, de otra manera no vamos a poder capturar desde localhost) y ver como reacciona el juego:


Bueno, eso fue fácil.


Supongo que ya está. Sucede que al juego no le importa un carajo el servidor después de todo, y puede funcionar perfectamente sin ninguna funcionalidad implementada. En este estado, todo funciona menos el mensaje de texto (la parte con el HTML roto), la escritura y lectura de puntuaciones y el sistema de repeticiones, pero en su esencia es de otra manera completamente jugable. Si bien el juego ya es funcional en el estado actual, ahora ya es momento de comenzar a implementar todas las funcionalidades del servidor una por una.


Reimplementando el servidor

Si analizamos los resultados de Wireshark podemos ver múltiples peticiones al servidor cuyos puntos de enrutamiento no pueden ser encontrados, todos ellos sobre la ruta /JM_test/service/:


Como podemos ver por los parámetros de consulta, el cliente no encripta la información que envía, facilitando bastante nuestro trabajo.


Podemos usar esta información (junto a las cadenas de texto dentro del ejecutable) para saber que puntos de enrutamiento tenemos que implementar en nuestro servidor, y analizar como el cliente maneja la información que espera recibir (o simplemente adivinar) para finalmente comprender cómo funciona todo. Suena bien en teoría, pero veamos lo que cuesta ponerlo en práctica.


Presiona para mostrar el código
GET     /JM_test/service/GameEntry
GET     /JM_test/service/GetMessage
GET     /JM_test/service/GetName
GET     /JM_test/service/GetRanking
GET     /JM_test/service/GetReplay
POST    /JM_test/service/ScoreEntry

Listado de todas las peticiones hechas por el programa.


Comencemos sacándonos de encima el más simple de todos, GetMessage, devolviendo una cadena de texto:


Presiona para mostrar el código
app.get('/JM_test/service/GetMessage', (req, res) => {
  res.statusCode = 200;
  res.send('Hello World!');
});


Me siento muy afligido por haber desperdiciado esta oportunidad perfecta para escribir alguna frase graciosa en lugar de un simple ¡Hola Mundo!, pero soy una persona adulta y debo comportarme como tal.


La función que más se llama de todas es GameEntry, la cual asumo que es para la autenticación de usuario, usada para iniciar sesión, obtener las puntuaciones y comenzar una partida. Estos días uno esperaría un token encriptado siendo transferido seguramente hacia el servidor, pero en este caso solo tenemos los parámetros de consulta id y pass. También hay un parámetro game, siempre con el valor 0, y uno ver, para asegurarse de que el cliente está siempre actualizado.

Este es el punto en el cual tenemos que empezar a pensar sobre armar una base de datos para almacenar la información de usuario (y más adelante también las puntuaciones). Para esto voy a usar MongoDB con Mongoose para el modelado (porque prefiero morir antes que usar SQL), aunque cualquier otro motor de base de datos debería funcionar. Así que asumiendo un modelo con los campos id, pass y rankings (para puntuaciones personales), una implementación completa sería así:


Presiona para mostrar el código
app.get('/JM_test/service/GameEntry', (req, res) => {
  res.statusCode = 200;
  User.findOne({ id: req.query.id, pass: req.query.pass }, (e, user) => {
    // Comprobar si el usuario existe y las credenciales son correctas.
    if (user) { res.send(); }
    // Comprobar si ya existen usuarios con el mismo id y crear uno si se permite.
    else if (req.query.id.length > 0 && options.register) {
      User.findOne({ id: req.query.id }, (e, exists) => {
        if (!exists) {
          // Guardar nuevo usuario en la base de datos.
          const user = new User({ id: req.query.id, pass: req.query.pass, rankings: [] });
          user.save(); res.send();
        // Un usuario con este id ya existe.
        } else { res.send('1'); }
      });
    // Nombre de usuario o contraseña incorrectos.
    } else { res.send('1'); }
  });
});


Este código no implementa ninguna medida de seguridad, ya que eso está fuera del alcance de este proyecto. En un servicio en línea real (por si alguien quiere hacer eso), este comportamiento probablemente deba cambiarse, o al menos no guardar las contraseñas como texto plano. Aparte de eso, añadí una propiedad register en un objeto de opciones, que permite que los usuarios se registren desde el cliente mismo si el id no concuerda con ningún resultado en la base de datos. Además, habrás notado el retorno del valor 1 como mensaje de error si el inicio de sesión falla. Después de investigar un poco, descubrí que ésta es la respuesta necesaria para activar el mensaje de ‘id o contraseña incorrectos’ en el cliente, en adición al código 10 para el error de conexión con el servidor y otro más que no pude encontrar para activar el error de versión del cliente.

Siguiente tenemos a la llamada GetRanking, la cual tal vez sea la última parte de retroingeniería que tengamos que hacer, ya que ninguno del resto de los puntos de enrutamiento requieren datos formateados especialmente como respuesta. Los parámetros de consulta son id (id de usuario, el cual puede ser opcional), mode (dificultad), que puede ser 0 (normal), 1 (difícil) o 2 (muerte), y un parámetro view para determinar entre puntuaciones de usuario o globales. Antes de continuar, veamos como se estructuran y clasifican las puntuaciones, y cuál es la respuesta del cliente hasta ahora.

Las puntuaciones se clasifican en dos grupos principales: puntuaciones personales y puntuaciones globales, y cada una está clasificada a su vez dependiendo de la dificultad, dando un total de 6 listas de puntuaciones. La diferencia principal entre ambas es que las personales pueden almacenar hasta 10 entradas en cada tabla sin guardar repeticiones, mientras que las globales pueden contener una cantidad indefinida de entradas con repeticiones, pero solo una por usuario. Las puntuaciones, tanto personales como globales, contienen los siguientes campos: id (id de usuario, dueño de la entrada), mode, score, jewel, level, class (asumo que es el título del jugador) y time (también hay un campo date dentro del juego, pero aparentemente nunca se llegó a implementar). Estos campos también son enviados por el cliente en la llamada de ScoreEntry, por lo que podemos crear un modelo de base de datos a partir de estos.


Parece que el juego intenta usar la página HTML ‘no encontrada’ que Express.js envía automáticamente.


Esto me llevó un par de horas para entenderlo, pero así es como funciona el formato de de las puntuaciones: cada objeto de puntuaciones es una cadena de texto de 10 líneas, y un grupo de ellas se delimitan con un caracter de punto (.). Las primeras dos líneas indican el índice de tabla y el id de la puntuación, y los siguientes son (en orden) el id (de usuario), score, un valor sin usar, level, class, time, jewel y finalmente una bandera de resaltado. Los primeros dos valores solo son útiles para las puntuaciones globales, ya que el primero se usa para indicar la posición inicial de la puntuación del usuario en las puntuaciones globales (y para obtener el índice de Mi Récord), y el segundo es un valor (asignado por el servidor) para identificar y pedir una repetición con GetReplay. El valor de class (de vuelta, asumiendo que es el título de jugador) puede ser 101, 102, 201, 202, 301, 302 y 303, y la bandera de resaltado colorea las puntuaciones de amarillo, aunque no sé bajo qué condiciones una puntuación debería ser marcada con ésta (nuevamente, voy a asumir que su uso intencionado es el de marcar la puntuación más alta del usuario en una tabla).

La mejor parte es que cada objeto de puntuaciones tiene que tener exactamente 10 líneas, una más o una menos y el cliente se cuelga. Casualmente sucede que la respuesta por defecto de Express.js también tiene 10 líneas, funcionando perfectamente como un objeto de puntuaciones válido. Esto fue la clave para entender por qué el programa se colgaba cuando cambiaba la respuesta, y eventualmente me ayudó a comprender el formato. La implementación completa:


Presiona para mostrar el código
app.get('/JM_test/service/GetRanking', (req, res) => {
  res.statusCode = 200;
  // Administrar las puntuaciones personales.
  if (req.query.id && req.query.view == '0') {
    User.findOne({ id: req.query.id }, (e, u) => {
      let ranks = [];
      // Ordenar las puntuaciones de forma descendente.
      let rankings = u.rankings.sort((a, b) => b.score - a.score);
      for (let r of rankings) {
        // Construir una cadena de respuesta.
        let lit = (r == 0) ? 1 : 0;
        let rank = `0\n0\n${r.id}\n${r.score}\n0\n${r.level}\n0\n${r.time}\n${r.jewel}\n${lit}`;
        // Añadir puntuaciones para el modo seleccionado.
        if (req.query.mode == r.mode) { ranks.push(rank); }
      }
      // Responder con las cadenas concatenadas.
      res.send(ranks.join('.'));
    });
  // Administrar las puntuaciones globales.
  } else {
    // Ordenar las puntuaciones de forma descendente.
    Ranking.find({ mode: req.query.mode }).sort({ score: -1 }).exec((e, r) => {
      if (r.length > 0) {
        let ranks = [], f = -1;
        // Asignar el índice de la tabla de puntuaciones.
        let index = req.query.view == '-1' ? 0 : req.query.view;
        if (req.query.id) {
          // Encontrar el índice de posición de la puntuación en la tabla.
          f = r.findIndex((v) => v.id == req.query.id);
          if (f != -1) { index = Math.floor(f / 10); }
        }
        // Rellenar la tabla de puntuaciones de 10 ranuras.
        for (let i = (index * 10); i < (index * 10 + 10); i++) {
          if (!r[i]) { break; }
          // Construir una cadena de respuesta.
          let lit = (i == f) ? 1 : 0;
          ranks.push(`${index}\n${r[i]._id}\n${r[i].id}\n${r[i].score}\n0\n${r[i].level}\n${r[i].class}\n${r[i].time}\n${r[i].jewel}\n${lit}`);
        } res.send(ranks.join('.'));
      } else { res.send(); }
    });
  }
});


Pero para poder ver las puntuaciones, primero tenemos que ser capaces de guardarlas. Así que ahora es momento de añadir una ruta para la llamada de ScoreEntry, la cual a diferencia del resto, es la única petición POST de todas. A pesar de esto, toda la información de la puntuación se transmite a traves de parámetros de consulta, ya que el cuerpo se usa para enviar los datos de repetición. No voy a entrar en los detalles del código ya que es bastante largo y simplemente guarda la información recibida, pero cabe mencionar que el servidor se encarga de administrar las puntuaciones y repeticiones adecuadamente, actualizando y reemplazando las entradas cuando sea necesario. Además implementé una opción multiscores, para permitir múltiples entradas por usuario en las puntuaciones globales, y posibilitar así el almacenamiento de múltiples repeticiones. Los datos son enviados como un objeto application/octet-stream envuelto en una petición multipart/form-data. Si bien Express.js incluye una función para enviar datos adjuntos (descarga), no puede recibir/guardar (subir) este tipo de peticiones, para lo cual voy a usar el middleware Multer y dejar que se encargue de eso.


Debo decir que son muy buenas puntuaciones para solo una sesión de pruebas.


Y ahora que ya tenemos las repeticiones guardadas en el servidor, podemos enviarlas a petición del cliente. Implementar GetReplay es muy sencillo (recordemos que tenemos control sobre el valor de id, enviado con GetRanking):


Presiona para mostrar el código
app.get('/JM_test/service/GetReplay', (req, res) => {
  res.download(path.resolve() + '/rep/' + req.query.id + '.rep');
});

Las repeticiones están almacenadas en la carpeta rep con la extensión .rep.


Finalmente, por último y mucho menos importante, la llamada GetName, para la cual no pude encontrar ningún uso.


Porteando el servidor

Ahora que ya tenemos el servidor de Node.js listo con todas las funcionalidades implementadas, es momento de pasarnos al lado oscuro, un lugar al cual no le desearía estar ni a mi peor enemigo, hacer un servidor web en El Lenguaje de Programación C™. Para esta tarea masoquista, me voy a ayudar con el Servidor Web Mongoose (no confundir con el anterior Mongoose para el modelado de base de datos), una libraría de C diseñada para crear pequeños servidores en dispositivos embebidos, y LMDB, una base de datos llave-valor (en contraste al modelo basado en documentos de Mongo) muy liviana y rendidora. Otras librerías que voy a utilizar incluyen mjson (por los desarrolladores de Mongoose) para leer y escribir los objetos en la base de datos y las estructuras JSON enviadas por el cliente, e ini (muy descriptivo) para leer el archivo de configuración del servidor. No voy a explicar en detalle la implementación en C (a menos que me quieras escuchar quejándome sobre errores de asignación de memoria y la cagada que es manipular objetos y texto, perdón, estructuras y arrays de caracteres terminados en valor nulo en C) ya que es básicamente lo mismo conceptualmente a lo que ya vimos con Node.js, y el código es como cuatro veces más largo. Si querés podes ir y verlo en la página de GitHub.

Sin embargo, sí voy a hablar sobre la nueva adición en esta versión, específicamente la inyección de DLLs y hooks (enganches) de funciones de red. Hasta ahora estuvimos editando el archivo de hosts de Windows para redirigir todas las llamadas del cliente hacia nuestro servidor local, ¿pero no sería genial no tener que hacer eso? Además, sería ideal poder iniciar con el servidor de fondo mientras se ejecuta el cliente, y detenerlo cuando el proceso de éste se termine, dando así una experiencia más transparente. De la misma manera, también queremos algo de flexibilidad, así podemos usar estos hooks para conectarnos a otros servidores, tanto en C como en Node.js, de forma local o a través de internet, así que vamos a ello.


Inyectando los hooks

De las mil maneras que hay para inyectar DLLs y hacer hooks de funciones del sistema, voy a usar un método de inyección que ya tenía hecho de otro proyecto, y el conocido MinHook como librería de hooking. Así que veamos qué es lo que tenemos que enganchar abriendo Ghidra y mirando las importaciones en el ejecutable del cliente:


De todas las librerías, la única que nos interesa es WinINet (wininet.dll), una API de redes del sistema para manejar todas las operaciones de comunicación a través de HTTP y FTP. Como lo único que queremos hacer es redirigir las llamadas al servidor, las únicas funciones que nos interesan son InternetOpenUrlA para todas las peticiones GET, e InternetConnectA, la cual es necesaria para que ScoreEntry abra la conexión antes de pedir la URL. Para implementar los hooks, inicializamos MinHook en DllMain y apuntamos a las funciones de desvío, las cuales van a modificar el nombre del host con la dirección que le demos, y finalmente devolver el flujo de ejecución a la función original con el parámetro modificado.


Presiona para mostrar el código
// Definir punteros hacia las funciones originales.
typedef int (WINAPI *INTERNETCONNECTA)(HINTERNET, LPCSTR, INTERNET_PORT, LPCSTR, LPCSTR, DWORD, DWORD, DWORD_PTR);
INTERNETCONNECTA fpInternetConnectA = NULL;
typedef int (WINAPI *INTERNETOPENURLA)(HINTERNET, LPCSTR, LPCSTR, DWORD, DWORD, DWORD_PTR);
INTERNETOPENURLA fpInternetOpenUrlA = NULL;

// Definir funciones para sobrescribir las originales.
int WINAPI dInternetConnectA(HINTERNET hInternet, LPCSTR lpszServerName, INTERNET_PORT nServerPort, LPCSTR lpszUserName, LPCSTR lpszPassword, DWORD dwService, DWORD dwFlags, DWORD_PTR dwContext) {
  // Cambiar el nombre de host original con la dirección IP configurada.
  return fpInternetConnectA(hInternet, (LPCSTR)HOSTNAME, nServerPort, lpszUserName, lpszPassword, dwService, dwFlags, dwContext);
}
int WINAPI dInternetOpenUrlA(HINTERNET hInternet, LPCSTR lpszUrl, LPCSTR lpszHeaders, DWORD dwHeadersLength, DWORD dwFlags, DWORD_PTR dwContext) {
  // Cambiar el nombre de host original con la dirección IP configurada.
  char buf[200]; int ofs = 21; snprintf(buf, 200, "http://%s%s", HOSTNAME, lpszUrl + ofs);
  return fpInternetOpenUrlA(hInternet, buf, lpszHeaders, dwHeadersLength, dwFlags, dwContext);
}

BOOL WINAPI DllMain(HMODULE hModule, DWORD fdwReason, LPVOID lpReserved) {
  switch (fdwReason) {
    case DLL_PROCESS_ATTACH:
      // Inicializar MinHook.
      MH_Initialize();
      // Hacer hook a InternetConnect() y InternetOpenUrl() para redirigir las llamadas al servidor hacia localhost.
      MH_CreateHookApiEx(L"wininet", "InternetConnectA", &dInternetConnectA, (LPVOID *)&fpInternetConnectA, NULL);
      MH_CreateHookApiEx(L"wininet", "InternetOpenUrlA", &dInternetOpenUrlA, (LPVOID *)&fpInternetOpenUrlA, NULL);
      MH_EnableHook(&InternetConnectA);
      MH_EnableHook(&InternetOpenUrlA); break;
    case DLL_THREAD_ATTACH: break;
    case DLL_THREAD_DETACH: break;
    case DLL_PROCESS_DETACH:
      // Desactivar hooks y cerrar MinHook.
      MH_DisableHook(&InternetConnectA);
      MH_DisableHook(&InternetOpenUrlA);
      MH_Uninitialize(); break;
  } return TRUE;
}

Prestarle atención a la variable global HOSTNAME, la cual va a almacenar la dirección asignada en el archivo de configuración server.ini. No voy a mostrar la carga de las opciones para ser breve.


Para terminar con esta parte, quisiera mencionar que también intenté hacer un hook para la librería de Direct3D 9 para forzar el modo de la ventana a pantalla completa, pero me encontré con varios problemas. Pasa que, como se puede apreciar en las importaciones, no hay rastro de d3d9.dll. Eso es porque el programa delega todas las funcionalidades del juego (video, audio, controles, desempaquetamiento de datos, etc.) a la librería Skeleton.dll, la cual es cargada con LoadLibraryA una vez que el programa se ejecuta. Debido a la forma en la que funciona MinHook (y cualquier otra librería de hooking), es necesario que el DLL ya esté cargado en memoria para poder obtener su dirección y realizar el hook. Eso no debería ser un problema si creamos un hook para LoadLibraryA y dentro de este crear un nuevo hook después de que ya se haya cargado el DLL, ¿verdad? Si bien esto debería ser así (bueno, supongo), MinHook devulve un error de inicialización cuando intenta activar el hook, a pesar de que es capaz de crearlo perfectamente bien. Yo creo que es un error específico de MinHook, pero a estas alturas ya estoy cansado (y corto de tiempo) como para reportar el problema o cambiar de librería, y ninguna de las alternativas que encontré eran igual de fáciles de usar y pequeñas en tamaño. Supongo que será para otra ocasión.


Configuración del servidor y uso del programa

Ahora que tanto el servidor como el hooking de librerías están completos, hablemos un poco sobre como van a funcionar desde la perspectiva del usuario. Como mencioné previamente, quería flexibilidad durante el uso del programa, para poder jugar localmente, conectarse a un servidor en línea u hospedar uno propio. Para conseguir esto diseñé modos de servidor, los cuales, dependiendo de cual esté seleccionado, cambiará la forma en la que se comporta el programa:


  • Modo 0 es para un servidor local para un solo jugador, corriendo en el fondo mientras se ejecuta el cliente.
  • Modo 1 es para una conexión en línea, desactivando la inicialización del servidor y base de datos, conectándose a la dirección especificada en el archivo de configuración.
  • Modos 2 y 3 son para crear un servidor en la dirección especificada en el archivo de configuración. Uno inicia el programa del cliente, el otro una ventana de consola con información del servidor.


Un servidor funcionando en el modo en línea (1) conectado a otro en modo de hospedaje (2) en una conexión LAN.


También añadí una opción para deshabilitar el hooking de DLLs, ya que podría alertar a programas de anti-virus (esto va a requerir añadir una entrada en el archivo de hosts manualmente). Además de configurar la conexión, también están las opciones de usuario mencionadas anteriormente: registro, múltiples puntuaciones y sin puntuaciones, porque por qué no. Aparte de esto, para usar el servidor solo basta con poner los archivos en la carpeta del cliente. Hablando de este, como ya no se puede descargar de forma oficial, me tomé la libertad de subirlo a archive.org. Este cliente es la versión 1.32, la única guardada por la Wayback Machine, pero la última versión conocida es 1.40. Si en algún momento la consigo voy a actualizar el archivo, y si no cambiaron mucho el servidor debería funcionar igual, considerando que no usa ningún parche específicamente codificado.


Error de servidor: desconectando…

Esta fue, como siempre, una experiencia interesante. Finalmente pude trabajar en un emulador de servidor y descubrir si todas las ideas y especulaciones que siempre tuve a través de los años eran ciertas. Si bien admito que este caso en particular fue un ejemplo bastante sencillo, y no es muy representativo de emuladores de servidores en general (usualmente mucho más complejos), aún así fue suficiente como para responder las preguntas que tenía, y al final pude cumplir mi objetivo de devolver un juego muerto a la vida. Y aparte, la sensación de saber que (probablemente) sos la primera persona en experimentar un título después de más de una década no tiene precio, a pesar de que en este caso ya sé que no lo soy (otro tipo ya intentó hacerlo hace unos años, pero nunca consiguió descubrir el formato del sistema de puntuaciones).

También estoy sorprendido por la cantidad de cosas que simplemente funcionaron puramente por adivinar o probar cosas, como la creación inicial del servidor y el formato de las puntuaciones, más que nunca antes. Al principio pensé que me llevaría más de una semana solamente haciendo ingeniería inversa del cliente para intentar descubrir su funcionamiento hasta cierto punto, pero en realidad solo me llevo 3-4 días incluyendo el desarrollo total del servidor en Node.js. De hecho, lo que más tiempo me llevó fue la implementación en C, casi 2 semanas. Supongo que es entendible ya que hasta ahora nunca antes había creado un programa en C desde cero (ni siquiera un ¡Hola Mundo!), completamente por mi cuenta. Fue un día para investigar como crear un servidor, otro para entender las asignaciones de memoria, punteros, compilar, creo que se entiende.

Al final estoy muy contento con los resultados, y espero que esto sirva como una fundación para proyectos futuros similares, porque esto es solamente el comienzo.

© Renzo Pigliacampo - 2022