Reviving a classic Korean online puzzle videogame - TwinHexa Arcade
Well... maybe not a classic, but an interesting one none the less.
• 33 min. read
Introduction
It's been a while since I last talked about online games, and since then I've been somewhat obsessed with online games history, spending countless hours and entire weekends researching the topic. However, one specific branch has caught my interest the most: Korean online games.
You might know South Korea mostly for their MMORPGs, with some massive (heh) games under their belt, such as Lineage and Maple Story, but I want to talk about the other, less-known side of the story: the non-MMORPG online games.
On this occasion I bring up another puzzle game, and while I already stated last time that I usually don't give a shit about puzzle games, there's some interesting and historically relevant lore around this one.
Background
As mentioned previously, South Korea is a country that pioneered online gaming, not only for consuming these games, but also for taking part in their development. One such developer is CCR, a company founded in 1995, mostly known for the legendary Fortress series and, their flagship MMORPG, RF Online.
Now, many of you might have not even heard about Fortress 2, but it used to be the biggest online game in South Korea around 2000-2001, even breaking records of total users and concurrent players during its heyday. Not only that, but also it's one of the longest-lasting Korean online games ever, having survived for over 21 years on service, despite all the ups and downs through its existence. Suffice to say, this game is a very important piece in the context of online gaming history.
In the following years, CCR would lose relevance and become a shadow of what it used to be, with many failed attempts at keeping the Fortress franchise alive, while at the same time doing next to nothing to grow as a company. However, when looking through their catalog, they definitely left some interesting games along the way, one such title being TwinHexa Arcade, released in the year 2000 for the X2Game service, CCR's online game distribution platform, around the same time as Fortress 2.
TwinHexa Arcade is an online arcade puzzle game, more specifically a Columns-like, or even better, a Hexa-like, being itself a rip-off of a rip-off, tracing back its roots to a game called Hexa, released by D.R. Korea in 1990 for arcades. Remember that at the time, Korea was comparable to China when it came down to copyright infringement.
But before TwinHexa Arcade, there was the original TwinHexa, released in 1997 and published by NETSGO instead of CCR, the developer of the game. In fact, there's been a legal dispute between these two over the original Fortress distribution rights, but that's a story for another time.
TwinHexa Arcade is also one of the first games CCR released with a proper development team, MARS, providing original and high-quality music and graphics, unlike previous games. While this game was nowhere near close to the popularity of Fortress 2, it still did pretty well on itself, having even several user forums/guilds made by dedicated players.
Now, after all that lore dump you're probably wondering: why choose TwinHexa over Fortress? And the answer is actually the exact same one that I had for Jewelry Master: it's just a simpler game with reduced functionality. Or at least so I thought, as you'll see next, this project ended up being a lot more complex than I initially anticipated, in almost every single way.
Before moving on, a bit of a disclaimer: I actually started this project back in 2023, working on it for a couple of days until I resumed development some months ago, so there's a 2-year gap in the middle. Consequently, while I tried my best to write something coherent, it's possible that I missed some details here and there, and I apologize in advance if something doesn't 'connect' properly or makes sense at all. Now with that out of the way, let's dive into it.
Initial look into the game
After installation, we can look at the files and find what appears to be the game executable, TH_Arc.exe. Upon execution a window appears, and then... nothing happens, as expected:
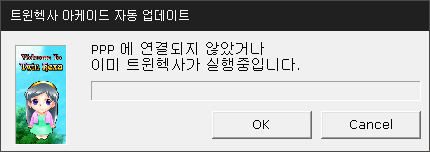
It gets stuck here, seemingly trying to connect somewhere.
In case your Korean is a bit rusty, let me point out that the title of the window mentions that it's an updater program, and not the actual game itself. Instead, this program is meant to check for updates at start and, once is done, run what would be the actual game process. So if we keep digging into the files, there's the suspiciously named tha.dat file, and if we look at its contents as raw data:
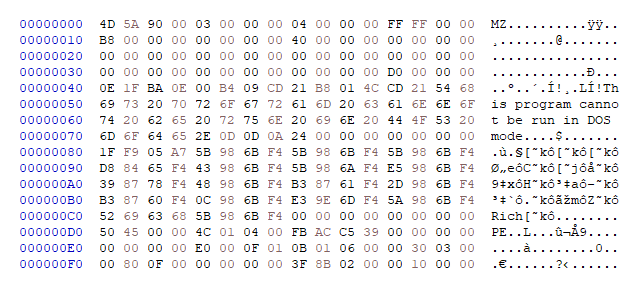
The classic stealthy, hidden executable.
Renaming this file to tha.exe and running it brings up the following window, which we can assume is the game launcher:
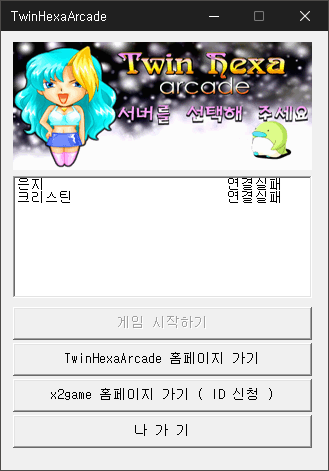
What you see right there is the servers list, and of course, none of them are online anymore. So, where does this list come from? The first place I looked into is the registry, as the key HKLM\SOFTWARE\CCR\MARSTEAM\TwinHexaArcade is created during the installation, together with the variables Server and MainServer, which point to http://twinhexa.x2game.com/. However, after further inspection, I realized that these values are only read by the updater program and not the game executable, so we can discard this possibility. After that, I decided that it's time to start looking into decompiling the game and hooking up a debugger, and eventually, I found out that the server list gets loaded from the file twinhexa00.dat, with a surprisingly straightforward format and encryption method:
- Format:
URL(IP or Hostname) +\r\n+Name - Encryption: all bytes are inverted in order and value (0xFF - 0xYY)

Original encoded server list (top), and the decoded output (bottom).
With this information, we can create our own server list and point to a local server instead. By adding an entry with the address 127.0.0.1 and hosting a dummy server on localhost at port 61400, we can move on and see what happens next:
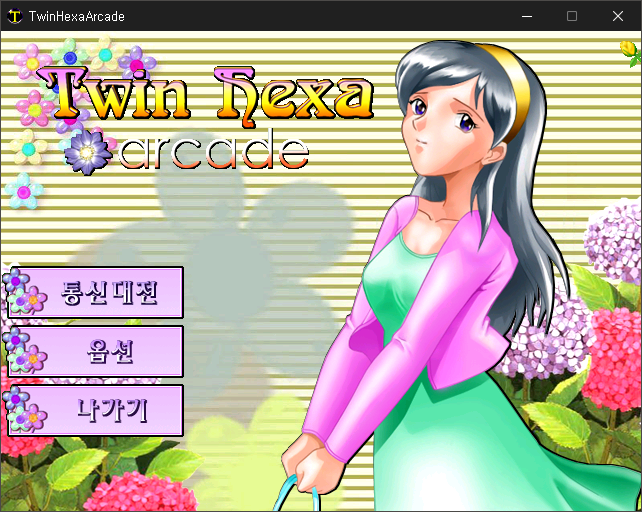
Success.
When clicking the first button to start the game... again, nothing happens; it just gets stuck waiting for a response from the server that will never come, so now it's time to start looking into that.
Figuring out the connection
This time around the game we're working with uses a raw TCP socket connection with a custom protocol on top, instead of just plain and simple HTTP. That immediately makes it more challenging, as we have to figure out and implement the custom protocol structure the game uses to define a valid network packet, which I'll tear down next.
Besides the previously mentioned server at port 61400, which works as a 'connection check' server, there's the main game server running at port 2000, so we need to create both. The former requires no logic, just needs to exist, but the latter is the important one, where all the game server logic will go:
This code corresponds to the Node.js implementation, more details about this later on.
serverConnection manages the game server connections and logic.
You can check the server code on GitHub if you want to follow along for the rest of the article.
Generally, the best starting point is to capture the game's network traffic and see what the client is sending to the server. However, that's not possible in this case, as the client is awaiting a response immediately after the initial connection, sort of an 'okay' packet besides successfully establishing the connection itself. Therefore, the only resort is to just look at the code, which, while not necessarily harder, is certainly more time consuming. So let me save us some of it and go straight to the point, and see what the packets actually look like:
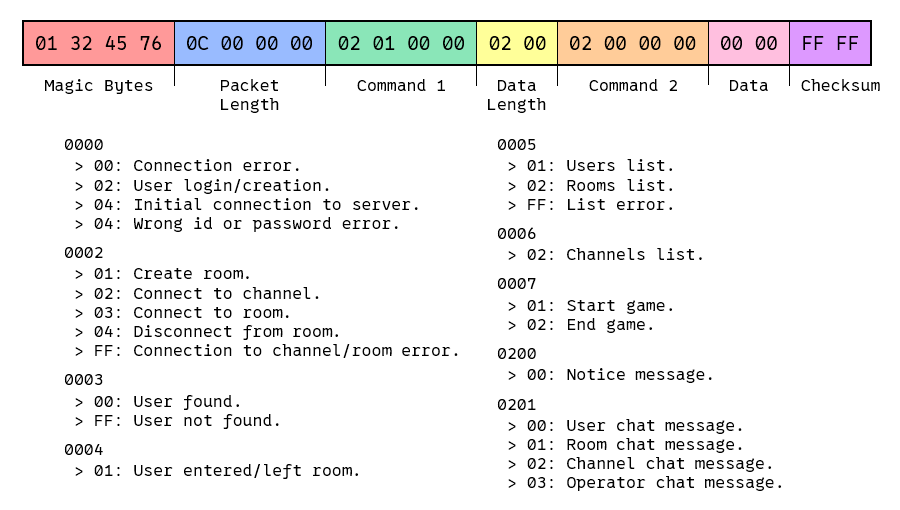
The packet protocol structure (top) and the full list of commands (bottom).
Don't worry about the commands just yet, we'll go through all of them later, so for now let's stick with the protocol.
First things off, the structure itself is actually divided into two sequential packets instead of a single one. The first packet includes the magic bytes and the packet length, while the second one includes everything else, that is, the commands and the actual data. Last but not least is the checksum, which is actually useless as its value doesn't matter; we just need those two extra bytes at the end.
The commands are also divided into two groups, a main command (Command 1) and a sub command (Command 2), where a different action will be executed depending on the combination of both. The former groups those actions by functionality, while the latter defines the specific action to execute within that group.
It's important to remark the tightness of the two packet structure, as the game client calls Winsock's recv twice within the main socket listening loop. This means that only once the first packet is received and checked the client will read the second packet. This creates a potential timing issue where, if we send both right away, the first recv could read the buffer of the second packet as well, causing undesired side effects such as softlocking or straight up crashing the game. It's crucial to keep this in mind for the actual implementation.
Speaking of which, let's take a look at the packetSend function and the very first response command, 0000 04:
packetSleep blocks Node.js's main thread by the given time, basically acting as a Sleep.
Not ideal, but the only way to get around the packets' timing issue in this implementation.
The command 0000 04 is the only one to have two purposes, but here it just confirms the connection to the game server, allowing us to proceed to the login screen:
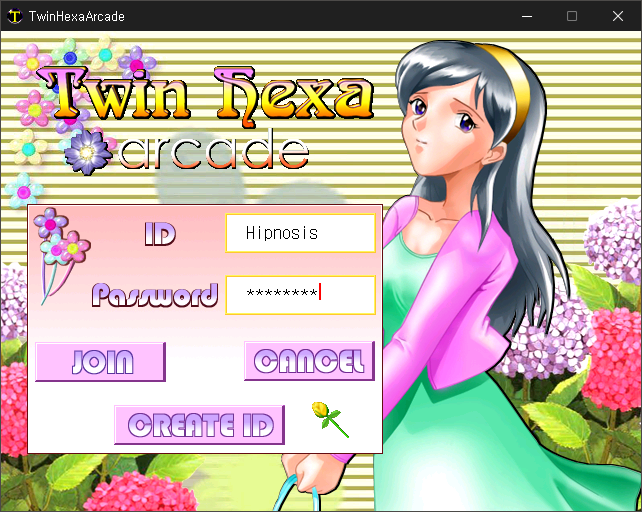
The CREATE ID button is actually to update the Hexa ID, or username.
When clicking the JOIN button, the very first packet from the game client is sent with the command 0000 04, similar to the one we sent before from the server, but this time receiving it instead. In fact, while not always the rule, it's going to be a recurrent thing where the client expects back in response a packet with the same command it sent.
To handle the incoming packets, we're going to make some changes to the serverConnection function:
packetCommand extracts the full command from the packet buffer.
Future supported commands will be added to the command switch.
The incoming packet holds the user login data, that is username and password (and some other stuff), although for now we don't really care about these, just want to proceed to the next screen. Sending a response packet with the command 0000 02 and a bunch of null bytes lets us through the login screen into what appears to be the lobby screen:
Looks a bit... empty, but it doesn't matter for now.
Clearly some stuff is missing, but it's progress nonetheless. At this point curiosity is strongly kicking in, so I'm tempted to hit that big CREATE button and see what happens:
The CREATE button triggers the packet 0007 01, which is for starting a game.
The default case in serverConnection mirrors the received packet, enough to make the client go through.
What you see right there is the practice room, which I kind of entered by accident. In fact, you could say that almost all progress made by this point has been somewhat by accident, so maybe it's time to take some steps back and try to fill the gaps in.
Researching channels, rooms, and users
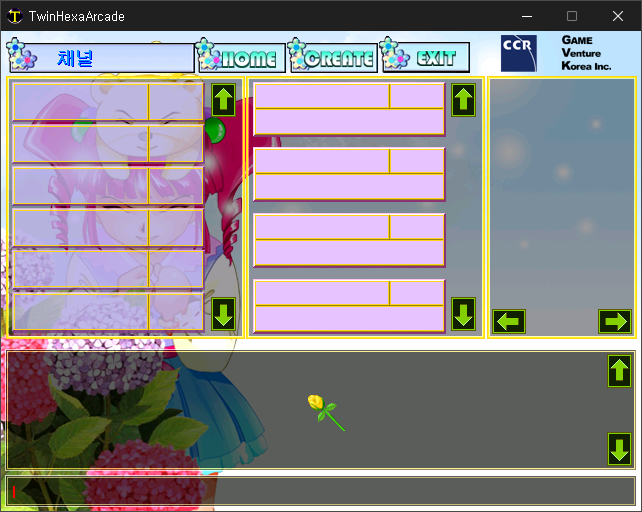
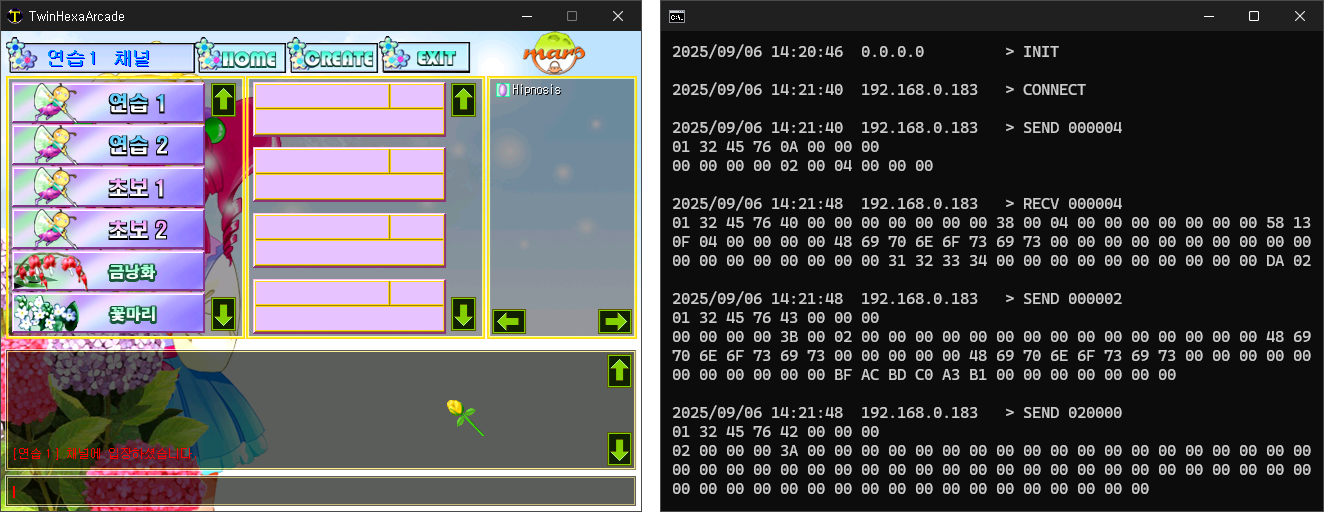
Let's go back to the lobby screen. After taking a look at the very few screenshots available online for this game (mainly sourced from the old defunct website), and reasoning with some common sense, we're missing three main elements here: the channels list, the rooms list, and the users list respectively.
After analyzing the client's code for over a fucking week (you'll see why the rage later), I finally figured out which commands are used for those lists and how these are supposed to work, so let me tear them down for you. For the time being, these are sent from the server after the login response.
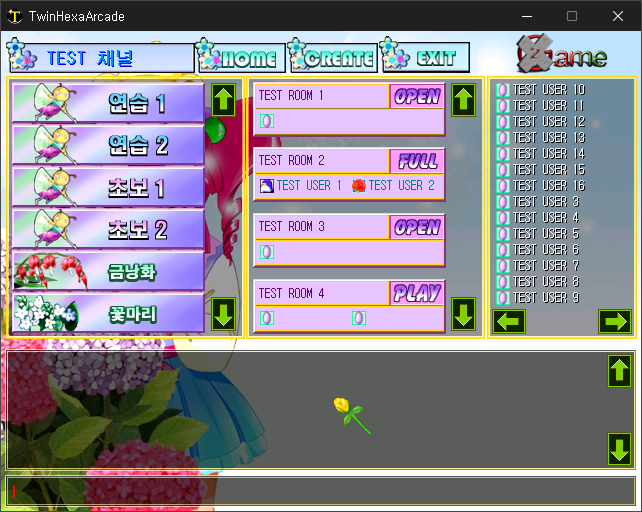
Doesn't look so empty now... albeit with dummy values for now.
First is the 0006 02 command that handles the channels list. Each channel is composed of three properties: ID, Name, and Mode. The first two are very self-explanatory, but the last determines the channel behaviour depending on its value: 0x00 for practice channel and 0x01 for normal channel. This Mode property also explains how I got into the practice mode before when clicking the CREATE button, as I sent the command 0000 02 full of null bytes (that is, a lot of 0x00s); I guess one of those indicated the state of the default channel the user gets put in when entering the lobby.
Also, as you can see in the screenshot, it turns out that the channels list worked differently in previous versions of the game compared to the one we currently have available. Before the channels could be created dynamically from the server, but this was later on changed to a fixed set of predefined channels that cannot be modified. The first two on the list are the only practice channels available, the following two are beginner channels (although they are treated as normal channels), and the rest are just generic normal channels, making a grand total of 22 channels available. I must say that the flower-themed channels are also a nice touch.
As for the code implementation, the response is pretty straightforward, with a result code that indicates to add/remove channels from the list (for channels the removal is useless, so I force it to be always 0x00), the channels count, and finally the serialized channels data, including the ID and Name (Mode is not necessary here):
serverChannels contains the predefined channels list.
Then we have the commands 0005 01 and 0005 02 for handling the users list and rooms lists respectively. In practice, they are extremely similar to the channels list, but this time the result code plays a bigger role:
0x00adds the included users/rooms to the list.0x01removes the included users/rooms from the list.0x02updates the included users/rooms in the list.
At first, I thought the lists were sent in their entirety, but the way it actually works makes much more sense, as it allows the data to be updated in a more atomic and optimal way.
Users have the properties ID, X2Game ID, Hexa ID, Rank, Room, and State. Yes, there are three different ID values: ID is an internal numeric value set by the server to identify a connected user, X2Game ID is the actual user ID, more specifically the ID for the X2Game service, and Hexa ID, the display ID or username. As for the room values, Room is the ID of the room the user is in (if any), and State indicates if the user is in a room or not; the users and rooms list display will change depending on these room values. I'll expand on the Rank property and user rankings in general later.
Rooms have the properties ID, Name, Users, and State. The Users property indicates how many users are in the room: 0x00 is none, 0x01 is one user (sets room to OPEN) and 0x02 is two users (sets room to FULL). The State property indicates if the users in the room are waiting in the room or already playing a match (sets room to PLAY).
As previously mentioned, it won't stay like this for too long.
As I said before, the implementation is almost identical to the channels list, so there's not much reason to show it, besides mentioning that instead of a fixed list of channels, now we have a dynamic list for both users and rooms. These lists are at the channel level, meaning that each channel has its own list of users and rooms. Don't worry about the code though, as it's only for demonstrative purposes so far; I'll talk about the implementations in detail later.
So now that we got the channels, rooms and users lists out of the way, let's work on actually playing the game.
Rooms, connections, and online play
So far we've only seen the practice rooms in action, but I also mentioned the existence of normal rooms, which are the ones that will allow two players to connect with each other, set up and play a match.
It all starts after the user login (command 0000 02), when the initial channel data is loaded. By default, I send the data for the first channel on the list, the Practice 1 channel, which of course has a Mode value of 0x00. However, it's possible to switch between channels by double clicking one on the list. This triggers the command 0002 02:
packetParse extracts data from the received buffer.
socket.userdata persists the channel, room and user data on the connection for convenient access.
The data sent to the client is responsible for updating the current channel data, plus triggering the commands 0005 01 and 0005 02 to update the rooms and users lists. When the Mode property has the value of 0x01, the CREATE button will trigger the command 0002 01 and proceed to the waiting room screen:
roomAdd also stores the user IP address, which will be used later to establish a connection with other users.
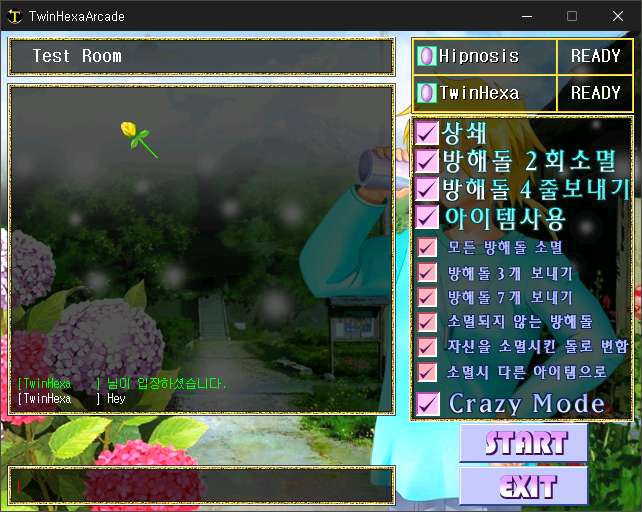
At first it's only you, but anyone can join to share your loneliness.
This will also update the rooms and users lists for everyone else, adding the newly created room to the list, and updating the user State to reflect these changes. With the new room on the list, someone can double-click on it to join, triggering the command 0002 03:
roomConnect adds the guest user to the room and notifies the host user with the command 0004 01.
The response contains the host user data, including the IP address saved previously (roomIp).
Multiple things happen simultaneously at this time: the notification to the host user that a guest entered the room, with the command 0004 01, and the P2P connection between the users:
roomSockets obtains the socket references from a room. The first element corresponds to the host user.
resultCode indicates if a user entered (0x00) or left (0x01) a room.
The P2P part is an interesting bit. Remember that this is the year 2000, before firewalls became the standard, and direct connections could be established right away without much issue. But in the year of our lord 2025, that's no longer allowed; by the router that is, as you have to manually open a port to allow a direct connection through it. Relatively modern applications would use something like relay servers or UPnP mappings to overcome these security measures, but TwinHexa here doesn't, requiring to manually open the port 41850 to allow incoming P2P connections. Some games that do support P2P also have fallbacks to a relay model in case the firewall disallows a direct connection, but that's not the case here.
In case the connection doesn't go through, the guest user will stay in the main lobby, and yes, things will break and there's nothing I can do about it, so just open the damn port. Now, assuming that this whole firewall thingy is not a problem, the guest user will effectively connect to the room on the server side of things, and it will also establish a direct connection with the host user. This direct connection will handle almost everything from now on, like the chat, settings, the READY/START buttons, and of course, the match itself.
The only commands left now are 0007 01 and 0007 02, to indicate that the match has started/ended respectively:
packetBroadcast is basically the same as packetSend, but for sending to multiple socket connections.
The command 0007 02 is roughly the same as 0007 01 for now; I'll expand on it in a moment.
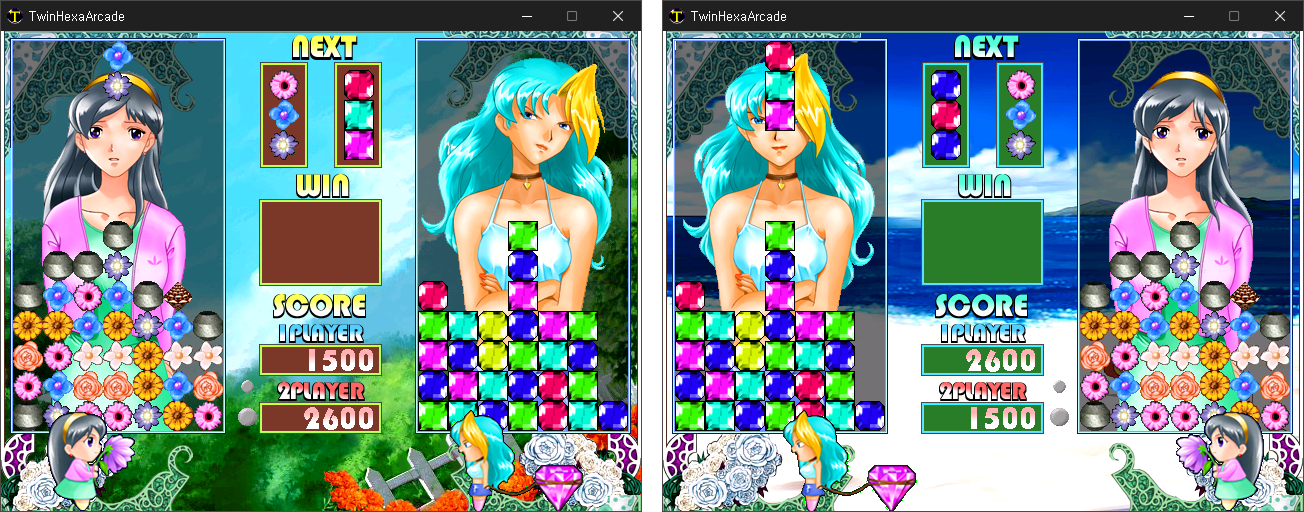
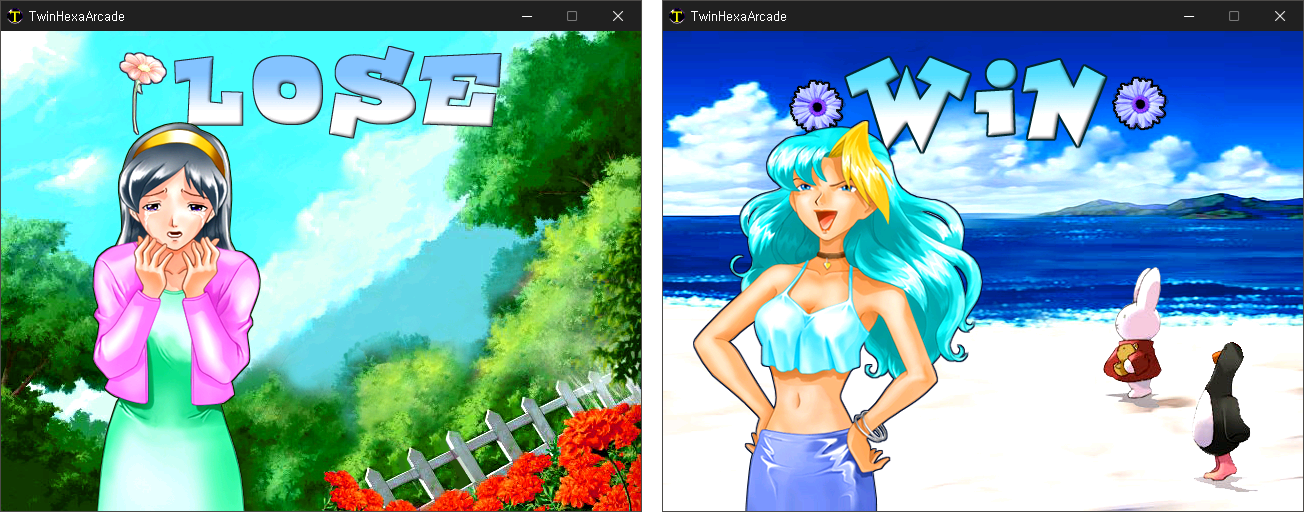
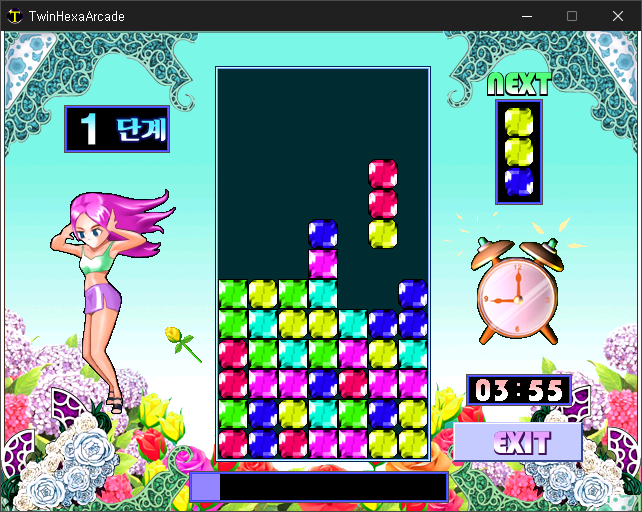
Two users (me and... myself) connected to each other playing through a match.
After a match ends, the command 0007 02 triggers and both users go back to the waiting room.
It's important to mention one aspect of the P2P connection. The server stores the remote IP address of the host user, which can be in a different range depending on how the client is connecting to the server. On normal server operation, a client connects from outside the local network, so it will be identified by its public IP address. But if the user connects from inside the local network, it will connect with its private IP address instead. This can create a scenario where if mixing both public and private connections, users might not be able to connect properly. For example, if a user connected locally hosts a room, the room IP address will be of private range, so if a user connected over internet tries to join said room it won't be able to, as it will try to connect to a device within its own local network instead. The way to get around such a scenario is to connect to the server through a public IP address or domain regardless of whether it's running locally or not.
And with this we're done covering the essential functionality of the server, now it's time to start looking at the secondary, but no less important features.
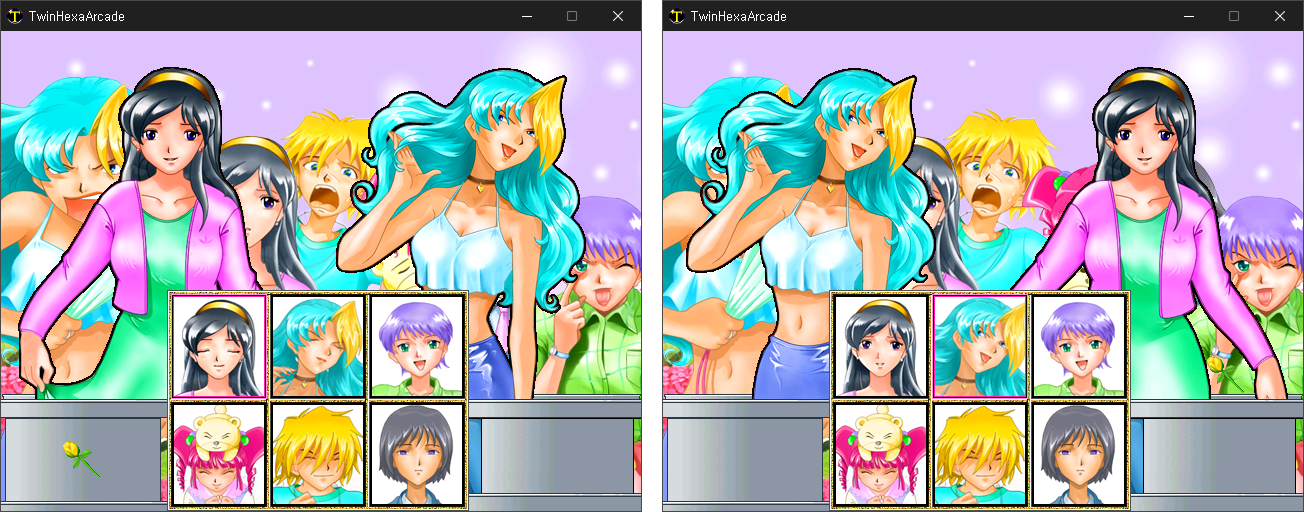
The user ranking system
As mentioned before, here I'll explain the user ranks and the scoring/ranking system. Although, you know what, I'll leave the game's website to explain it for me:
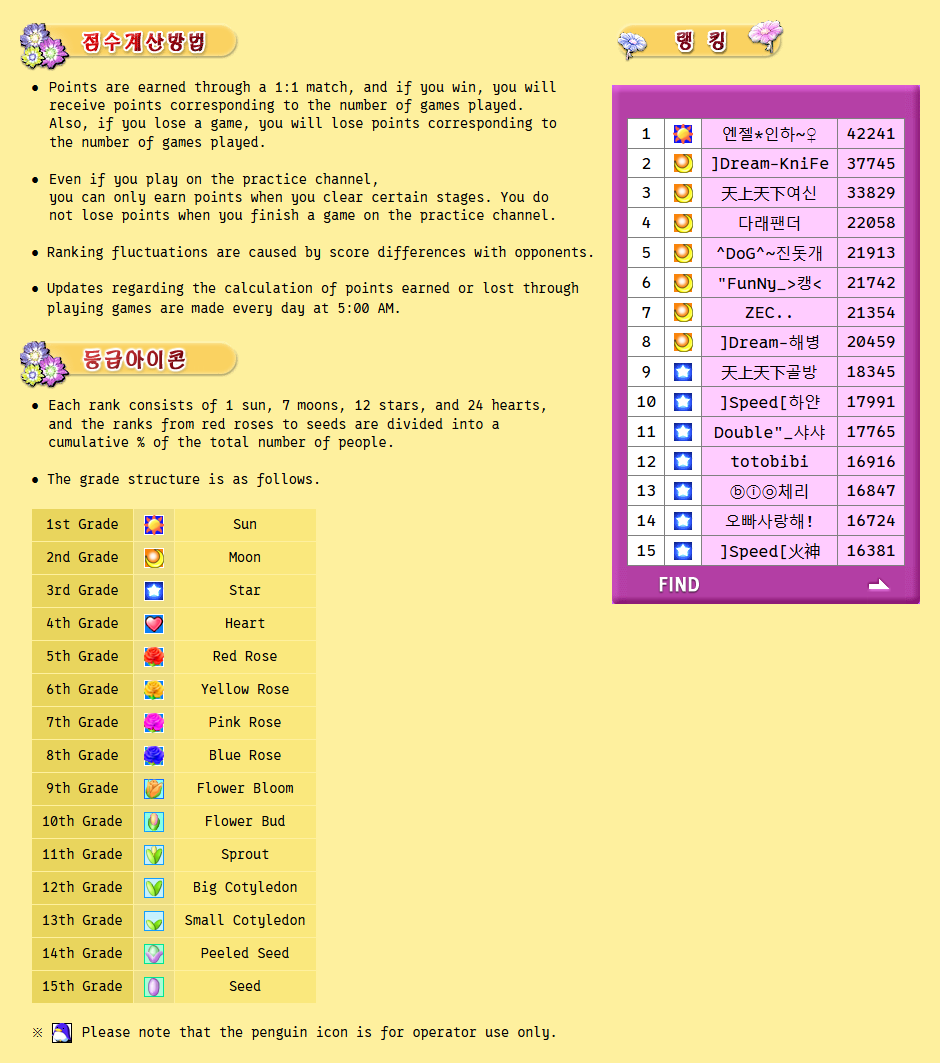
The user grades/ranks (bottom left), and the user rankings (right).
While this is pretty much everything you need to know, it's not completely correct, as it represents an older version of the game, and some things changed along the way. Specifically, the amount of user ranks have been reduced, playing on the practice channel doesn't give score anymore, and most importantly, the user ranking calculation is completely different:
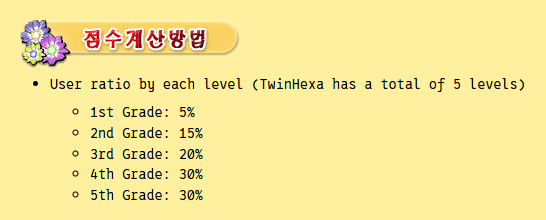
It's been simplified, a lot.
Even then, it's still not fully correct, as there are more than just 5 ranks, specifically 9, or 8 plus the operator grade. So, which ranking system do I use? I decided to go with the one from the website, but adapting the ratios to the 8 ranks available instead. But now another issue arises: what if there are not enough users to cover the ratios? Under my tests, I figured out that this ranking system only works properly starting with a minimum of 16 registered users, a scenario that's unlikely if playing the game locally or on small servers. So I came up with a solution: an alternative scoring calculation system. This model will assign grades based on a fixed score tier system, making it independent from the total amount of users.
UserModel is a MongoDB schema instance, find excludes the operator users and rankMode defines the system to use.
For maximum accuracy, this function will run each day at 05:00 AM.
Okay, so that covers the ranking calculation, but what about the score? When a match ends, the command 0007 02 is sent to the server with the results, specifying a code per user, covering all possible results:
0x00: Disconnection (Lose)0x01: Disconnection (Win)0x05: Lose (0-2)0x06: Lose (1-2)0x07: Win (2-0)0x08: Win (2-1)
Based on this value, we can calculate how much score a user will win/lose. As for how many points, I have no idea, so I'm just making 1 point per game.
userScore is stored as a number instead of a Buffer, only used internally to calculate the userRank.
The website also mentions the earning of points by playing on the practice channel, but as mentioned before, this feature has been removed in later versions of the game. As to why, I think I know the answer: the practice room runs completely offline, which means that users could cheat at will. In fact, that's exactly what I did while testing to clear the stages immediately (0x531B0 controls the score) and it just works, so maybe it became an issue and the developers just removed it. It's a shame, since without this it's impossible to progress through the ranking system while playing offline, but it is what it is.
The notice board
The notice/announcement screen is quite interesting. It gets triggered by sending the command 0200 00 on the lobby screen, ideally after the user login. Upon closing the notice dialog, guess what, the commands 0006 02, 0005 01 and 0005 02 are requested to the server. As it turns out, this is the correct flow of actions: first display the notice message, and then load the channels, rooms, and users lists. I realized this way too late, as by this point I had already figured out the lists commands on my own. Had I known about this earlier on, I’d have saved myself a lot of time, but it is what it is I guess.
Updated version of the x000002 function.
As for the contents of the notice itself, the message text isn't returned by the server; instead, it's read from the file twinhexa%d.not, with %d being a number between 0 and 100. The game client reads the files in descending order, or in other words, from most recent to oldest, allowing the update of the message text through this method. By default, the game client will read the file twinhexa16.not already included in the game files, but in case a file with a bigger number is present (e.g. twinhexa17.not), it will read that one instead. Therefore, it'd have been possible for the developers to update this message text by adding a new file incrementally through the updater program. Quite a smart solution, isn't it?
The twinhexa%d.not files use the exact same encoding as the servers list file (twinhexa00.dat), and the default text included contains an introduction to the game operation, specifically explaining the practice and beginner channels, and the creation of rooms. Just like before, we can override this text message by encoding our own message on a new .not file.
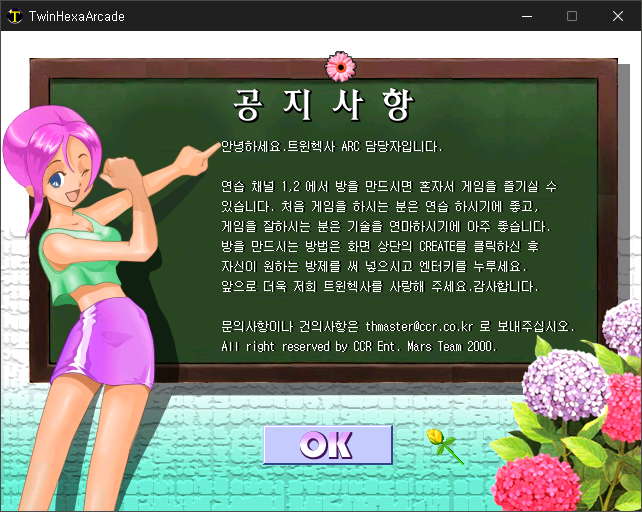
The default notice message text.
Chatting
The chat operates under the 0201 command group with the following subcommands:
00for direct/private message.01for room chat message.02for channel chat message.03for operator chat message.
While pretty straightforward, there are a couple of things to note:
- To send a private message, a special syntax is required:
/username text(e.g./Hipnosis Hello world!). - The subcommand
01never gets triggered, as chatting inside rooms is done exclusively via the P2P connection, so it was either never used, or it used to be managed by the server in previous versions of the game but got deprecated later on. - The subcommand
03only turns the text cyan, which is not very self-explanatory at first, but as it turns out, the code for this subcommand also gets called inside02in case the sender'sIDequals toTHmaster, leaving this special text decoration exclusively for operator users.
As a side note, only for that username, the user rank and name display will also change everywhere to the penguin icon and cyan color respectively. So while it's possible to assign the operator rank manually to any user, only the one named THmaster is the real operator.
Broadcasting a chat message to everyone connected to the same channel.
Operator users are identified by the userRank property.
In addition to the 0201 commands, there's the tightly related 0003 command group. The 0003 00 command is to search for users on the server and see if they are connected or not, and if so, on which channel they are in. It gets triggered by entering /w followed by the username to search for (e.g. /w Hipnosis). Funnily enough I found this by complete accident, since one of my testing usernames was just w (for being close to the Tab key, as it made the login process way faster), so while testing the 0201 00 command it just happened to trigger 0003 00 instead. As for what /w stands for, I don't know exactly, but it could be for 'where is ...?', or maybe it's just completely arbitrary, who knows.
x0003FF is also used in x020100 when no user is found while sending a private message.
Server implementations
As you have already seen across the entire article, I used JavaScript code to showcase the implementation of server features. All that code corresponds to the Node.js version, which implies the existence of another one, so let me explain myself.
First we have the general server, which uses Node.js for the engine and MongoDB for the database. This version provides a more traditional web server approach, offering a robust, scalable, and more stable alternative, making it more suitable to handle a large number of connections and amounts of data. This version only hosts the server; it offers no extra functionality. As it's the version we have seen in more depth so far, there's not much else to explain.
Then there's the other version I've not talked about yet, the embedded server, which is written from the ground up in C, aiming for performance, portability and small size, provided mainly for local/online play, although it can still be used to host large-scale servers. The only dependencies are LMDB for the database and MinHook for patching the game.
This version allows to host a server, connect to a server, or both at the same time. It also works as a loader that takes care of all the modifications needed to make the game work with the custom server. It's basically the whole package, giving the most transparent experience possible, running the server in the background and closing it once the game process finishes.
As for the actual code implementation, it's relevant to mention that both the Node.js and C versions have an almost identical code structure and logic. In fact, it's been surprisingly natural to make them so, as Node's Buffers map one to one with C's memory allocation, and code structure-wise, well, it's just a matter of organizing it properly. The biggest difference is probably that the Node version is object-oriented, while C is functional; other than that, there's not much else.
Now I want to focus on some important aspects of the C version, in particular, that the development of this server also implied the creation of several helper libraries:
libsocket: Sockets management library.libthread: Worker thread management library.libvector: Dynamic vectors library.libdb: Database management library.libini: INI file parser library.
The development of these libraries has greatly increased the scope and length of the project, but in turn, it has also improved the code quality substantially, allowing me to design simple APIs the way that I want without any limitations, retaining full control over them. For example, in the past I've used Mongoose for the server handling, but I realized that it just uses Winsock under the hood, and since I'm developing only for Windows it just ends up bloating the project with stuff that I don't need.
Simplified API definitions for libsocket.
While most libraries are very self-explanatory, you might be wondering what a worker thread is, so let's dedicate some time to it. A worker thread is a separated thread that runs code in parallel within the same process, allowing to offload computationally intensive tasks to leave the main thread responsive. In our case this is fundamental, as the main thread will focus on handling the connections, while the worker will handle all the server logic. This way we can avoid blocking the server polling function and receive requests as soon as they arrive, stacking tasks on the worker thread for it to execute once it's ready. Using this model is crucial since, as I mentioned before, the recv function reads whatever it's on the connection data buffer, so if we don't read it on time it's possible for several packets to stack together, and that would break pretty much everything.
Simplified API definitions for libthread.
libsocket and libthread working together. serverConnection now runs on the worker thread.
Now, what about Node? While it does have the concept of worker threads, they don't work as you might expect: each worker creates a new isolated V8 instance, which unfortunately makes it not possible to share memory directly between threads (despite being within the same process). And while it's possible to transfer the socket handle between them, there's a big issue: I need to access the socket on both threads simultaneously, on the main one to listen to the connection for incoming data, and on the worker to handle all the server logic, specifically to access the user data persisted on the socket and the sending of packets to the client. Making worker threads work with these limitations would also require a complete change of the server code, which of course I'm not doing, fuck that. Still, Node's asynchronous design somehow takes good care of this without having to manually implement worker threads, and so far during my testing I haven't had any issues, so I'm assuming it's fine by just leaving it as is.
And that does it for the server itself, now let's see how everything comes together.
The program loader and library hooking
The embedded server also integrates a loader that handles the server initialization and the game process creation, in addition to some patches required for everything to work. This loader program also hooks a custom library that intercepts some system calls to allow the usage of custom user-defined settings.
loaderInit gets called once the server initializes, and loaderClose when the game process ends.
The Sleep functions are to ensure that the process has been created correctly.
To keep it simple, the loader creates a process for tha.dat (the main game client executable) in a suspended state, proceeds to inject our custom library server.dll, and then resumes the process execution. There's also some explanation to do about those loaderPatch functions.
While developing the server I noticed a problem: rooms deletion was not working properly. For some reason, when a room that's not the last one on the list gets deleted, all the rooms IDs change on the client. So when a user attempts to connect to a room after receiving a room deletion packet (0005 02 01) it sends the wrong ID, which can result in one of two things: connecting a user to the wrong room, or attempting to connect to a room that doesn't exist. Also, for some reason, this only happens when there are 4 or less rooms (that is, a single page). Of course, this completely breaks the rooms list, so it has to be fixed somehow.
After looking into it for hours, and I ask you to trust me on this one as I want to keep it short, I concluded that it's a client-side issue and there's nothing I can do on the server to fix it. Well, except for one thing: patching the game. I know that's not ideal but I don't see another way out, at least without going insane. But don't worry, I tested it extensively and can ensure that nothing breaks and it effectively fixes the issue. Also, this same code logic is present for the users list as well, and while I haven't found anything that breaks it, just in case I'm applying the patch over there as well. As to why the game behaves like this under this very specific scenario, I have no idea, but I do acknowledge that there must be some logic to it.
And then we have the hook itself, which does the following:
- It loads a custom server list defined in the configuration by intercepting the file
twinhexa00.dat. - It optionally allows to load a custom notice message text by intercepting the files
twinhexa%d.not. - Handles all data encryption/decryption internally.
This is all configurable inside the server.ini file, plus some other options that change the server behavior as well; speaking of which, one of these options is quite important: ServerMode. The concept of server modes is something that I already talked about in the Jewelry Master article, although it's been simplified and improved this time around:
- Mode
0- Server + Client: Runs the server and starts the game client. - Mode
1- Server: Runs the server without client execution. - Mode
2- Client: Disables server emulation and starts the game client.
A server running in mode 2 (left) connected to a server running in mode 1 (right) on a LAN connection.
Compatibility issues
Before concluding, we have to talk about something that's kind of important and I haven't mentioned yet: the game client's several technical issues:
- Display errors at start: Solved by using a video wrapper.
- Garbled text and incorrect font: Requires Korean locale and font (such as Gulim).
- Freezes when music track ends: An almost game-breaking issue, the game freezes for some seconds when a music track finishes playing. This is particularly troublesome as it only freezes the display, but the internal game logic keeps running. On menus is not that big of a deal, but when it happens in-game it's not pretty. Probably has to do with how modern Windows handles MIDI, but solving this issue is way outside the scope here.
- Random crashes: Sometimes the game just likes to crash, so there's also that.
There's also some compatibility aspects to mention about the server and loader themselves.
First is the minimum system requirement: since it's a game that was made to run on Windows 98 I wanted the server to also work on it, but sadly it's not possible, as it doesn't provide the required APIs to hook system functions. This changed later on with the release of Windows XP (based on the newer NT kernel) and the introduction of the Detours library. Still, it's possible to patch the game files manually, replacing the functionality of the loader/hook.
Last is the creation of worker threads: in my implementation of libthread I make use of Condition Variables to sync threads, but these are only available since Windows Vista. Because I still want to support Windows XP, I added an alternative method using Event Objects instead, and while it's less performant and can lead to race condition issues, at least works. This will require two different builds, but ensures full compatibility with older systems.
Closing up
Well, that took fucking long, but I’m finally done. This has easily been my longest project so far, around 3-4 months of slow but steady work. But on the bright side, a lot of the tech built for this will be extremely useful for future projects, and things should go smoother from now on considering that I already have a well defined workflow for this kind of things.
As for the game itself, it actually grew on me a bit over time, but I'm still not a fan of these kinds of games (it has great music though). By the way, here's the game client download on archive.org and the server on GitHub; you won't get too far without them. The server code contains detailed documentation about all commands, including received and sent data structures, in case you want to take a look at that. Also, I recorded some gameplay showcasing the server in action; you can watch it on YouTube.
As for what comes next, rest, a lot of rest. After that, I'm thinking about updating the Jewelry Master server to be up to the new standards, and continue working on the unfinished business; hopefully I can deliver sooner than later.
And now talking about the future's future, I have several projects on the table, certainly there's some obscure shit in there as you could expect, but I also want to take some time off from programming and focus on other things, so let's see where life goes...